With the trailer disassembled to its core, I had to decide the order of construction. As the trailer is to be a demonstrator of permaculture, composting, and solar energy, the integration of each component was paramount – especially with the small footprint of this trailer.
My first component was the fish tank for the aquaponics. At first I was going to build a tank along three sides of the wall on the rear half of the trailer. But upon measuring I realised that I could put the tank BELOW the floor. The thought of a “glass bottom” was intriguing. Now for the design of the fish tank.
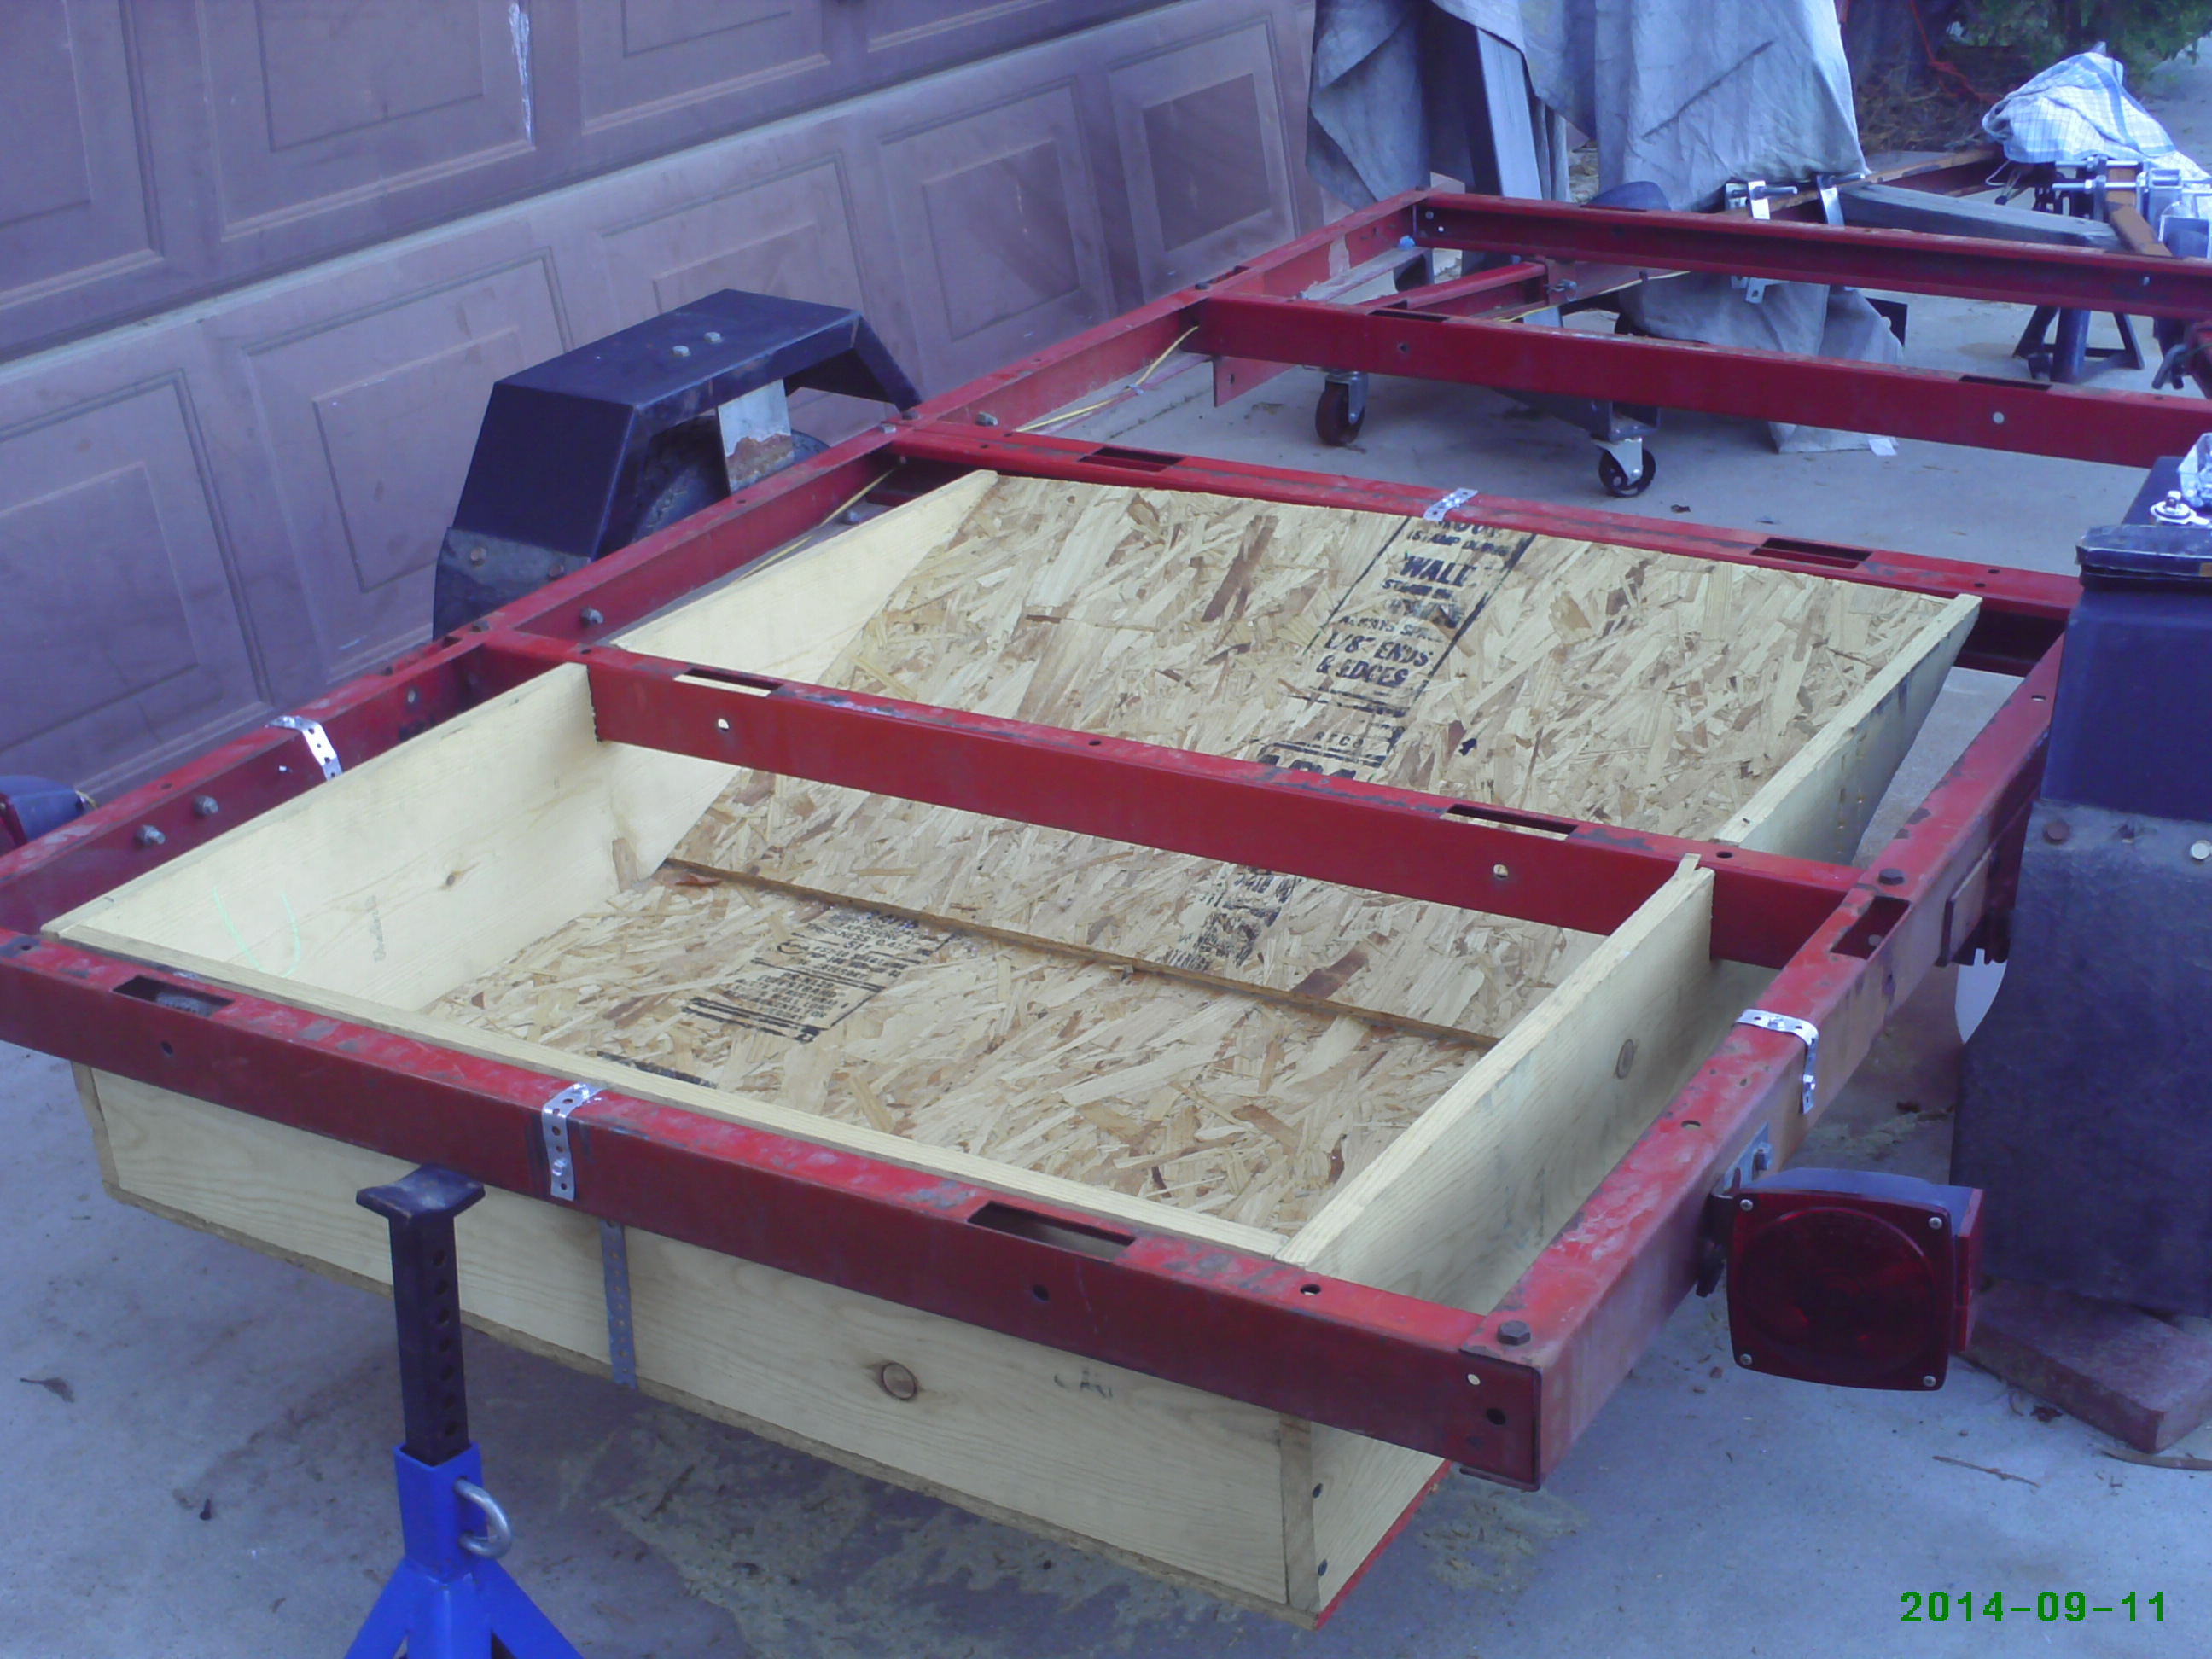
Fish Pond
It is 4′ long, around 3′ wide, and angles downward from the center of the floor. It is cut so that the lower right corner of the picture is the lowest point of the “pond”, facilitating placement of the drain. Notice the gaps to either side of the “pond”, this was to allow for clearance from the bolts on either side that secure the suspension system. The angle toward the center is to allow for movement of the axle during transit. I notched the “pond” sides to allow it to come fully flush with the floor when installed, and provide solid support for the liner to be installed later. The “pond” is supported to the frame with metal strap secured with two self-tapping screws at each point the strap connects to the frame (4 points) – one screw on top, and one on the side. The straps criss-cross under the “pond” to provide the strongest support base, and pulls the “pond” up to the metal frame securely.
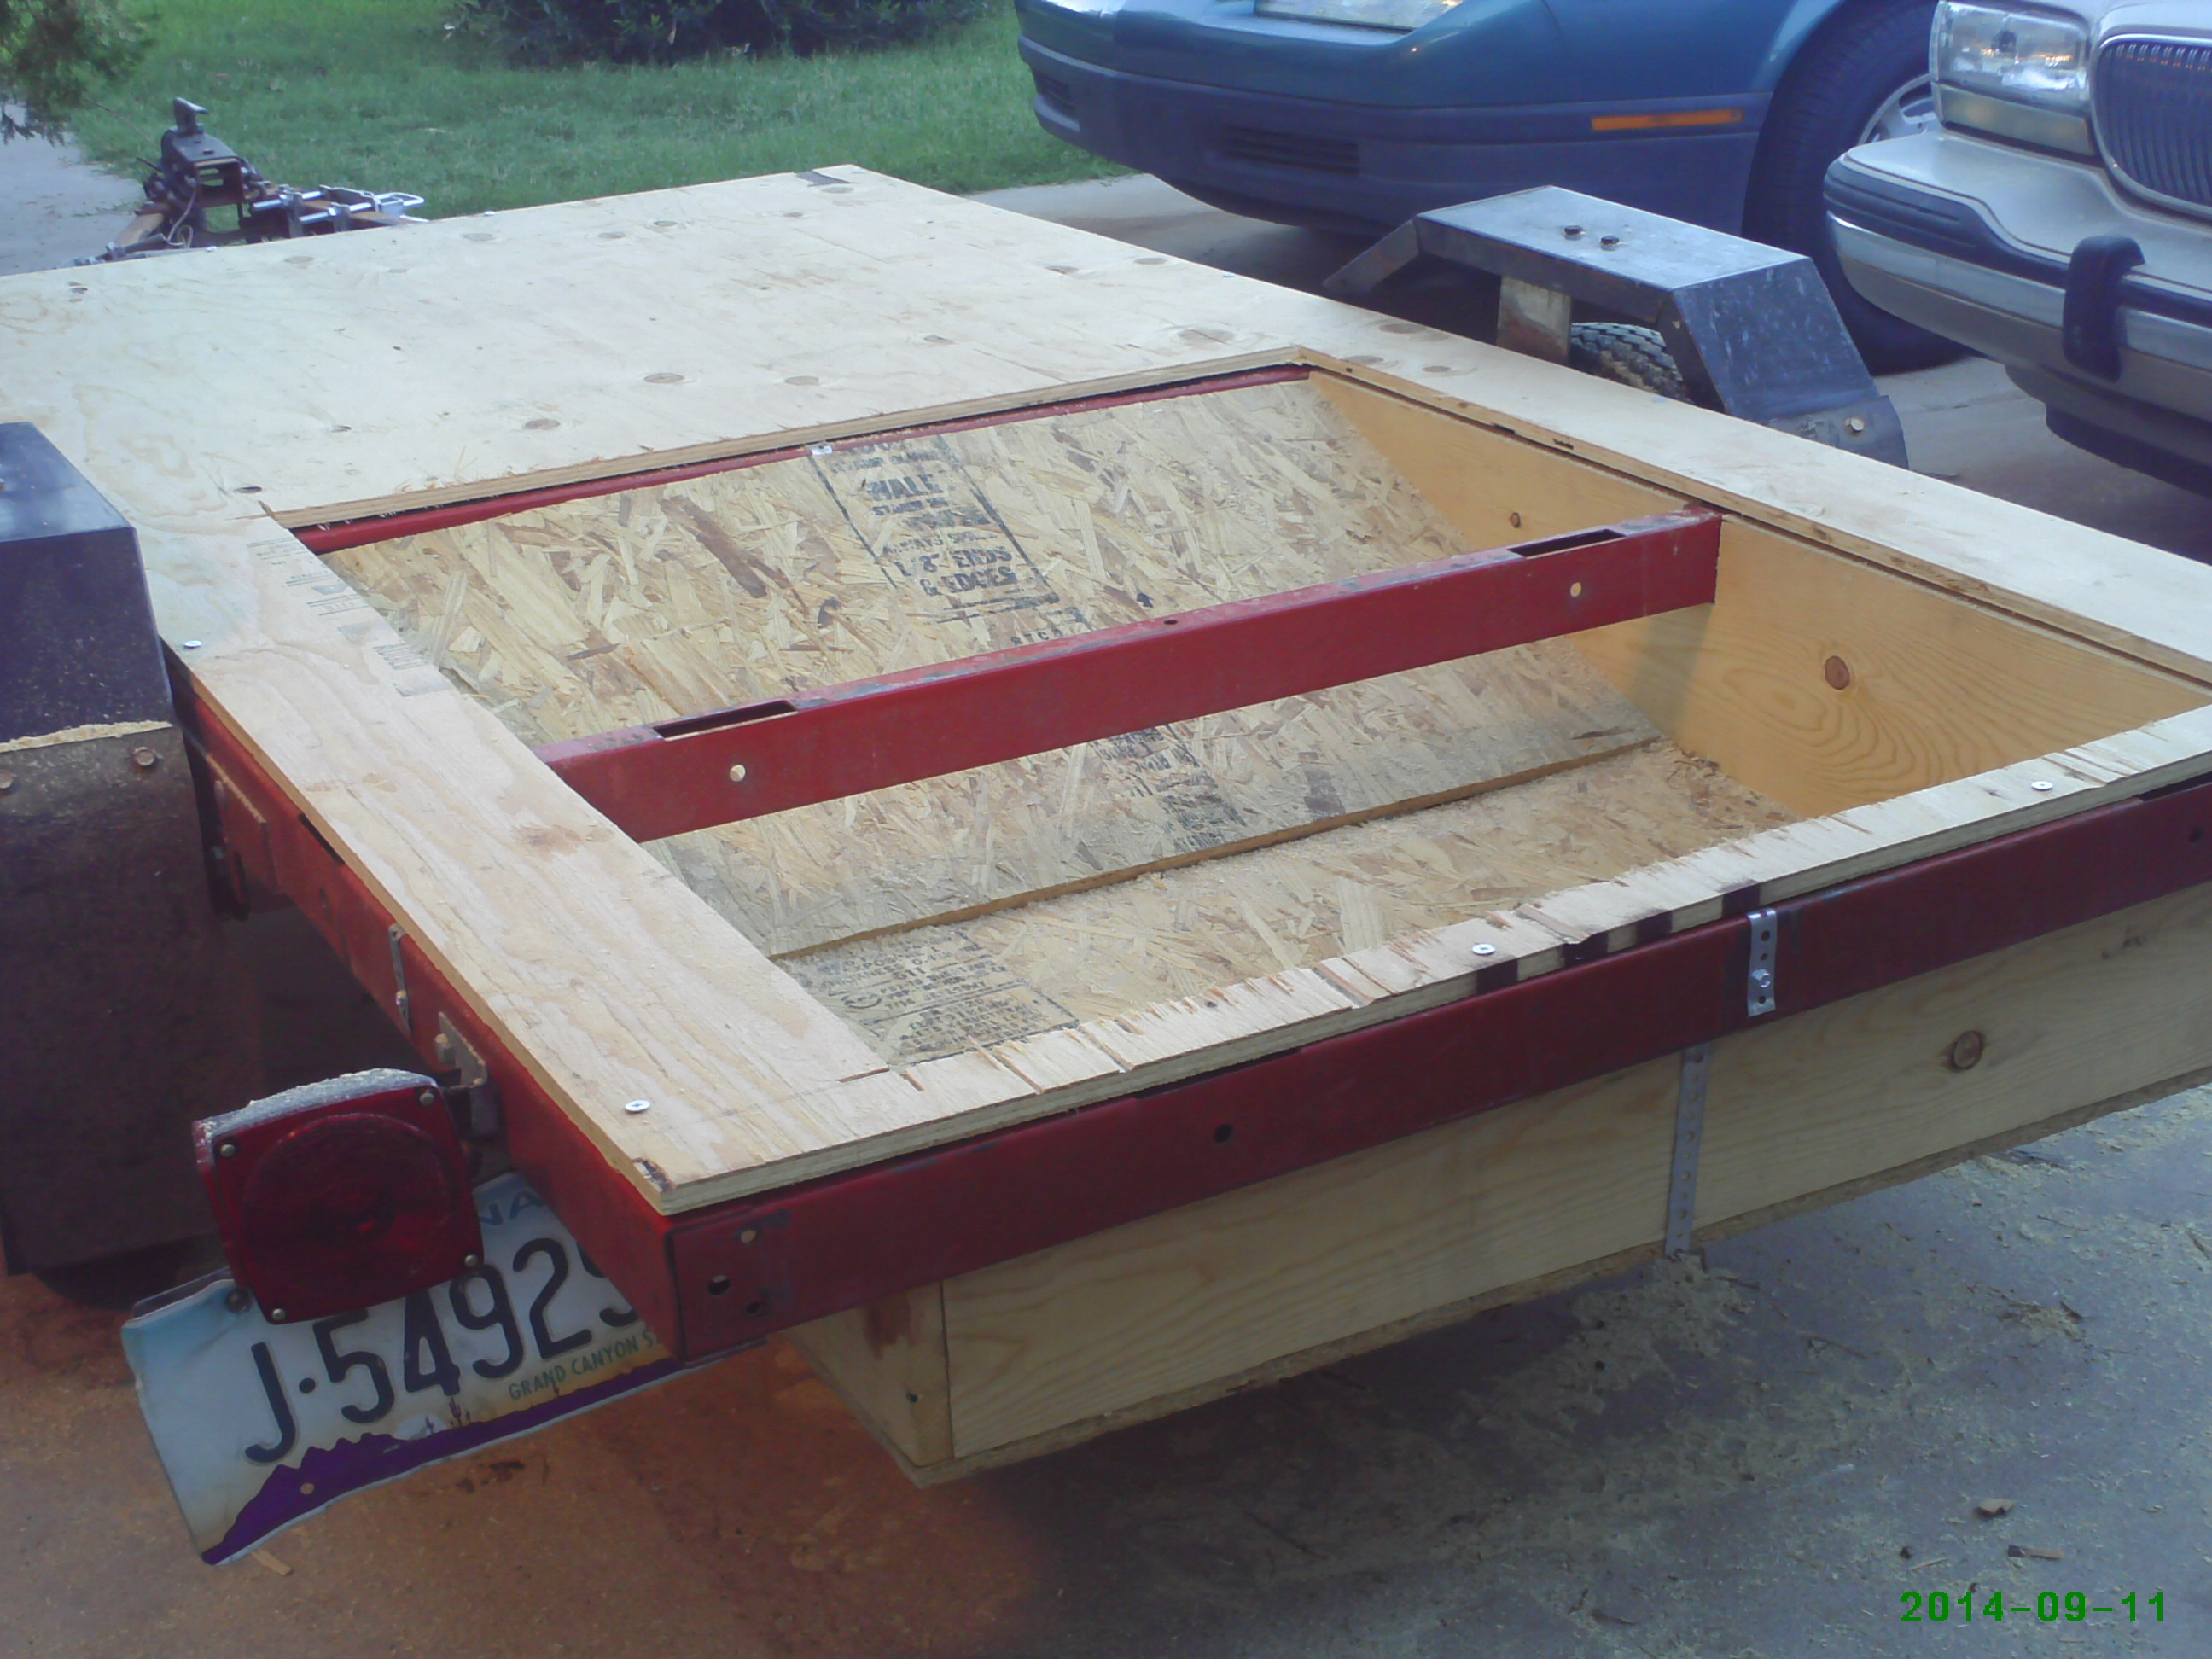
Add the Floor
The 4×8 foot 19/32 flooring was mounted and secured with self-tapping, countersunk screws along the framework at about 18″ intervals. Then we cut the opening to the “pond”.
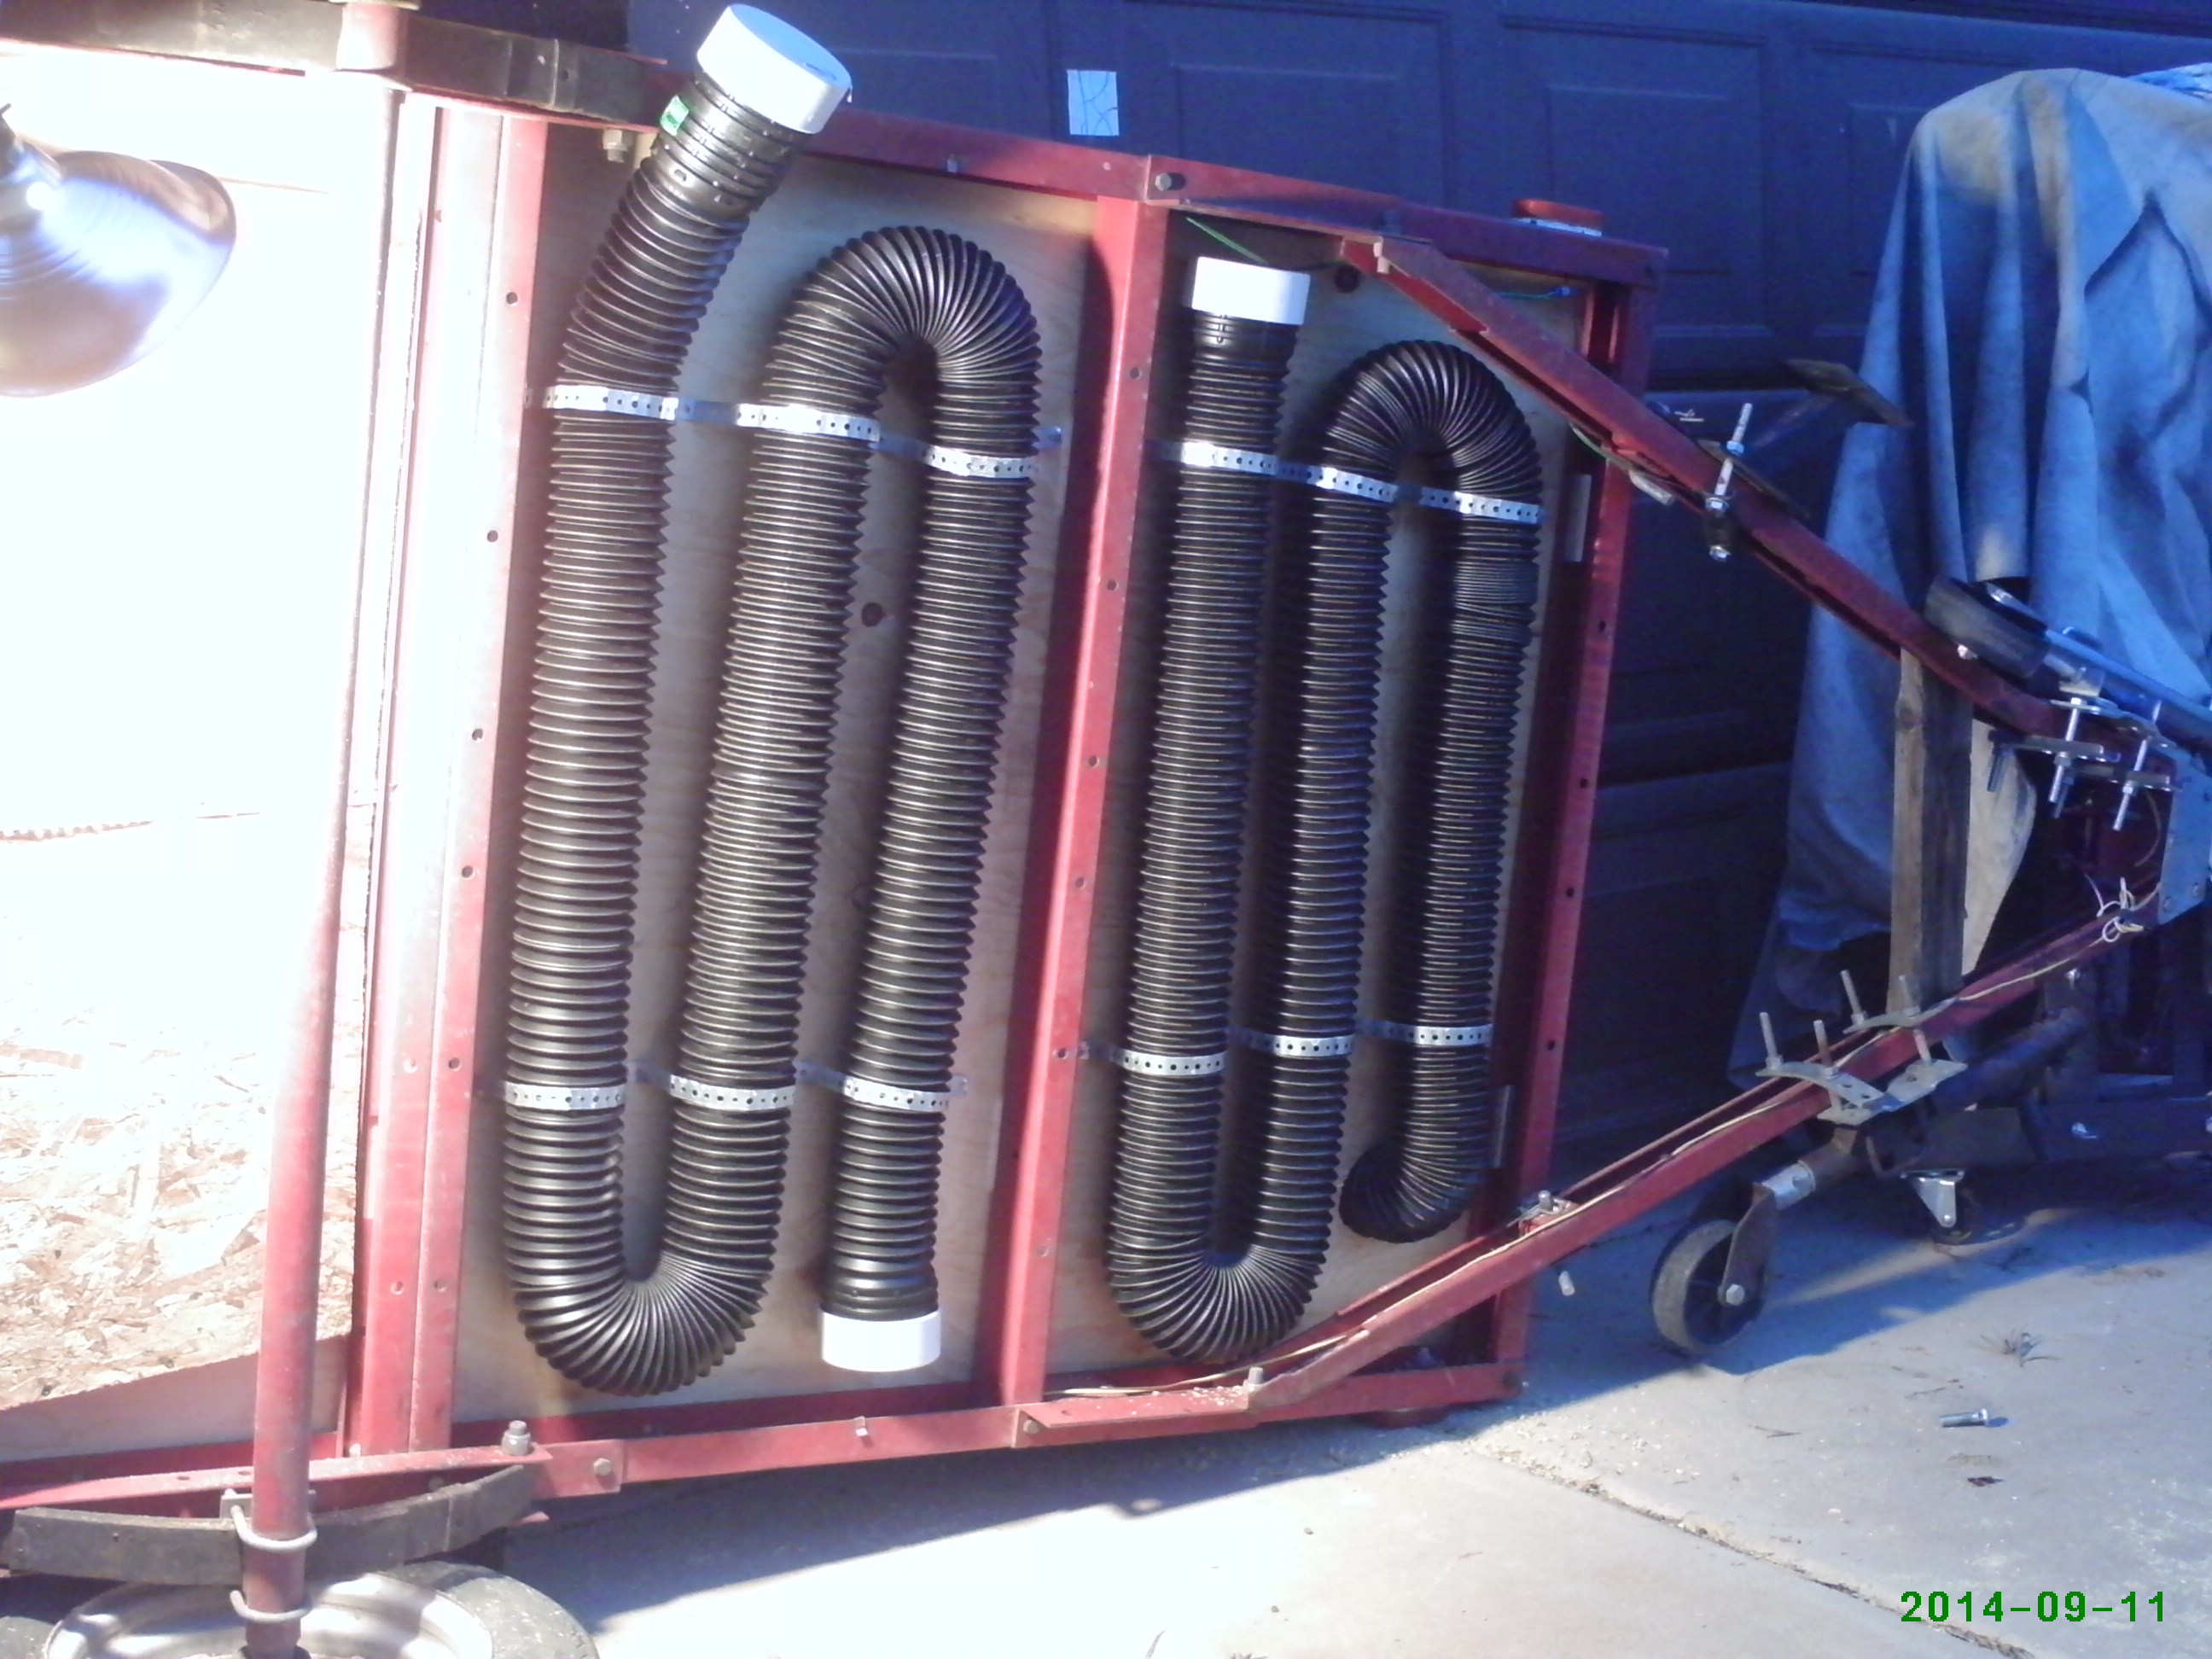
With the flooring secured, and the opening for the pond complete, I lifted the trailer on its side to install the two water “tanks”.
I recently ran into a discussion on the internet that proposed using pvc pipe placed in the floor of an RV. As I researched, I first realized that pvc would be expensive – especially for the fittings. Further research and I ultimately discovered that solid black, FLEXIBLE drain pipe came in 10 and 25 foot lengths. Measuring told me that 25 ft was too long, and 10 foot workable. The piping is 4″, and takes basic connectors for 3 or 4 inch drain pipe.
Water Storage
And by the way, I researched the allowable uses for the black pipe. According to the manufacturer, it is suitable for NON-PRESSURE POTABLE WATER . So – since my system will pump the fluid OUT instead of in, my installation will work just fine. Now … you can see in the picture there are two “tanks”. Both will be used as fresh water/rain catch tanks. I used the metal strap to secure the hose. Each of the sections is 10 feet in length, and 4″ in diameter. Estimated water capacity is 5-7 gallons each, for a total fresh water capacity of 10-15 gallons (plus or minus a few ounces).
Next time: Framing!