The Baby Scorpion Trebuchet Kit
One of the most vexing challenges of the Black Scorpion besides it imposing size, is that it takes nearly 7 minutes to reload! At events this time delay between shots makes it difficult to keep our audience engaged. A smaller, quicker loading trebuchet was called for.
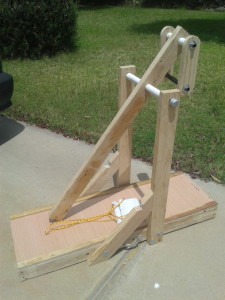
Enter the Baby Scorpion. It encompases all the modular aspects of the Black Scorpion, assembly takes one person only 5 minutes. The small parts have been simplified, and the 2′ by 4′ base serves as the carry case.
Two by four construction makes it sturdy, bolts with fender washers for long life, and the nuts are built right into the parts to reduce the number of small parts to lose!
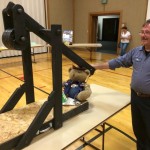
While the Baby was originally designed to use six 5 pound weights as the counterweight, kits built for a recent cub scout group were fitted with sand bags draped over the lower counter weight axle with great results.
Projectiles recommended are water balloons, fruit, tennis balls, the cub scouts even sent a nerf football into the air! Anything about a pound or less in weight works well, as long as it fits within the sling.
Fun Demonstrations of Science, Mechanics, and Ballistics
Trebuchets are a fun demonstration of many aspects of physics, mass, ballistics and trajectory, not to mention the several different aspects of mathematics calculations to better understand what is happening.
Kits will soon be available for purchase, as well as plans to build your own!
Details
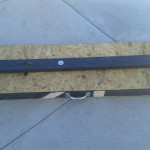
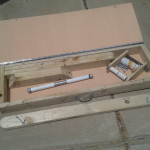
 The Baby Scorpion comes disassembled in its carry case/base. The throwing arm is bolted on the outside. Once the arm is unbolted, the lid can be lifted to reveal the rest of the parts.
There are two posts, two braces, the arm-axle, and the counterweight assembly, 2 long bolts and 6 shorter bolts each with fender washers.
Remove the parts, lay them aside, and close the lid.
Place the posts against either side aligning the bolt holes, then insert and finger tighten each bolt.
The axle has two plastic pipe sleeves. Remove one endcap, and one sleve, slide the axle through one post.
Slide the arm onto the axle (be sure the eye bolt on the end is down) at the inner hole, then place the sleeve back on and thread the axle into the opposite post, and replace the endcap.
Place the counterweight assembly on the end of the arm in much the same way.
Add your weights, attach the sling and you are ready to go!
