With a general plan, now comes the demolition. First up, will be removal of the seats. Generally, they are mounted to the floor with six bolts through the floor. Two along the wall, one front, and one rear of each seat. Then there are two bolts for each of the walkway legs. Seems straightforward.
NOT.
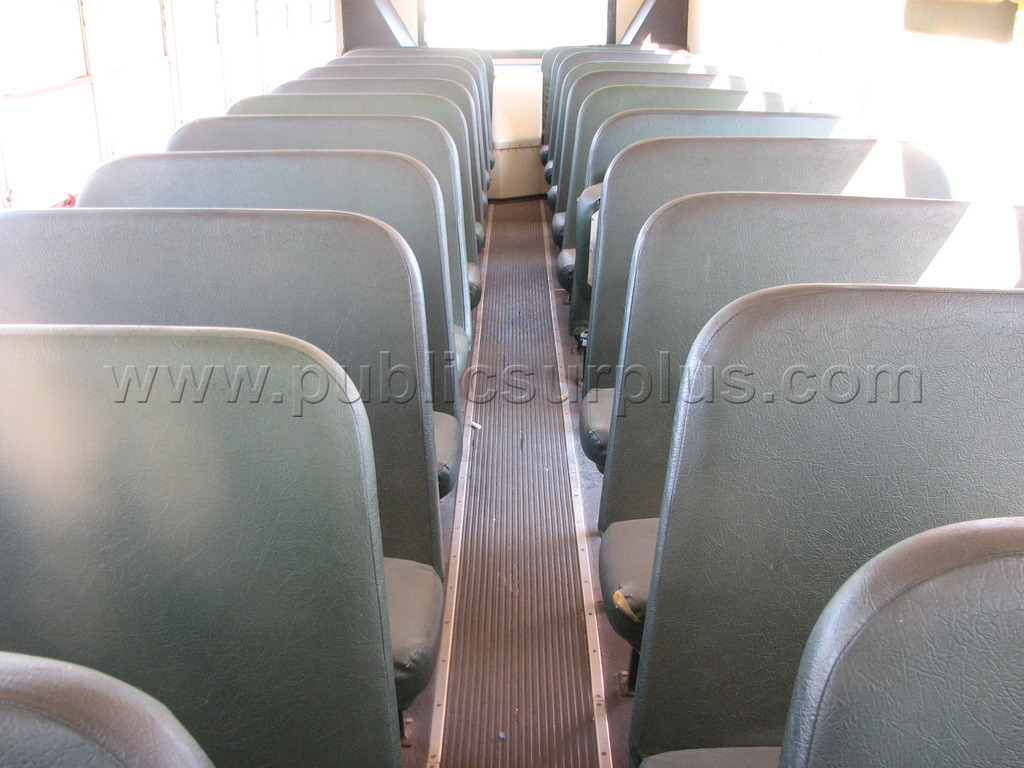
Seats with Upholstry
Well, I have discovered that there are no lockwashers on the nuts. What is happening is that the bolts … AND the nuts are turning as I attempt to remove them. After many frustrating attempts, I have given in to simply cutting off the bolt heads with an angle grinder. Even this is slow going. The legs, and other seats are just in the way. Unnnngggh!!! Only two seats have been removed in nearly three hours.
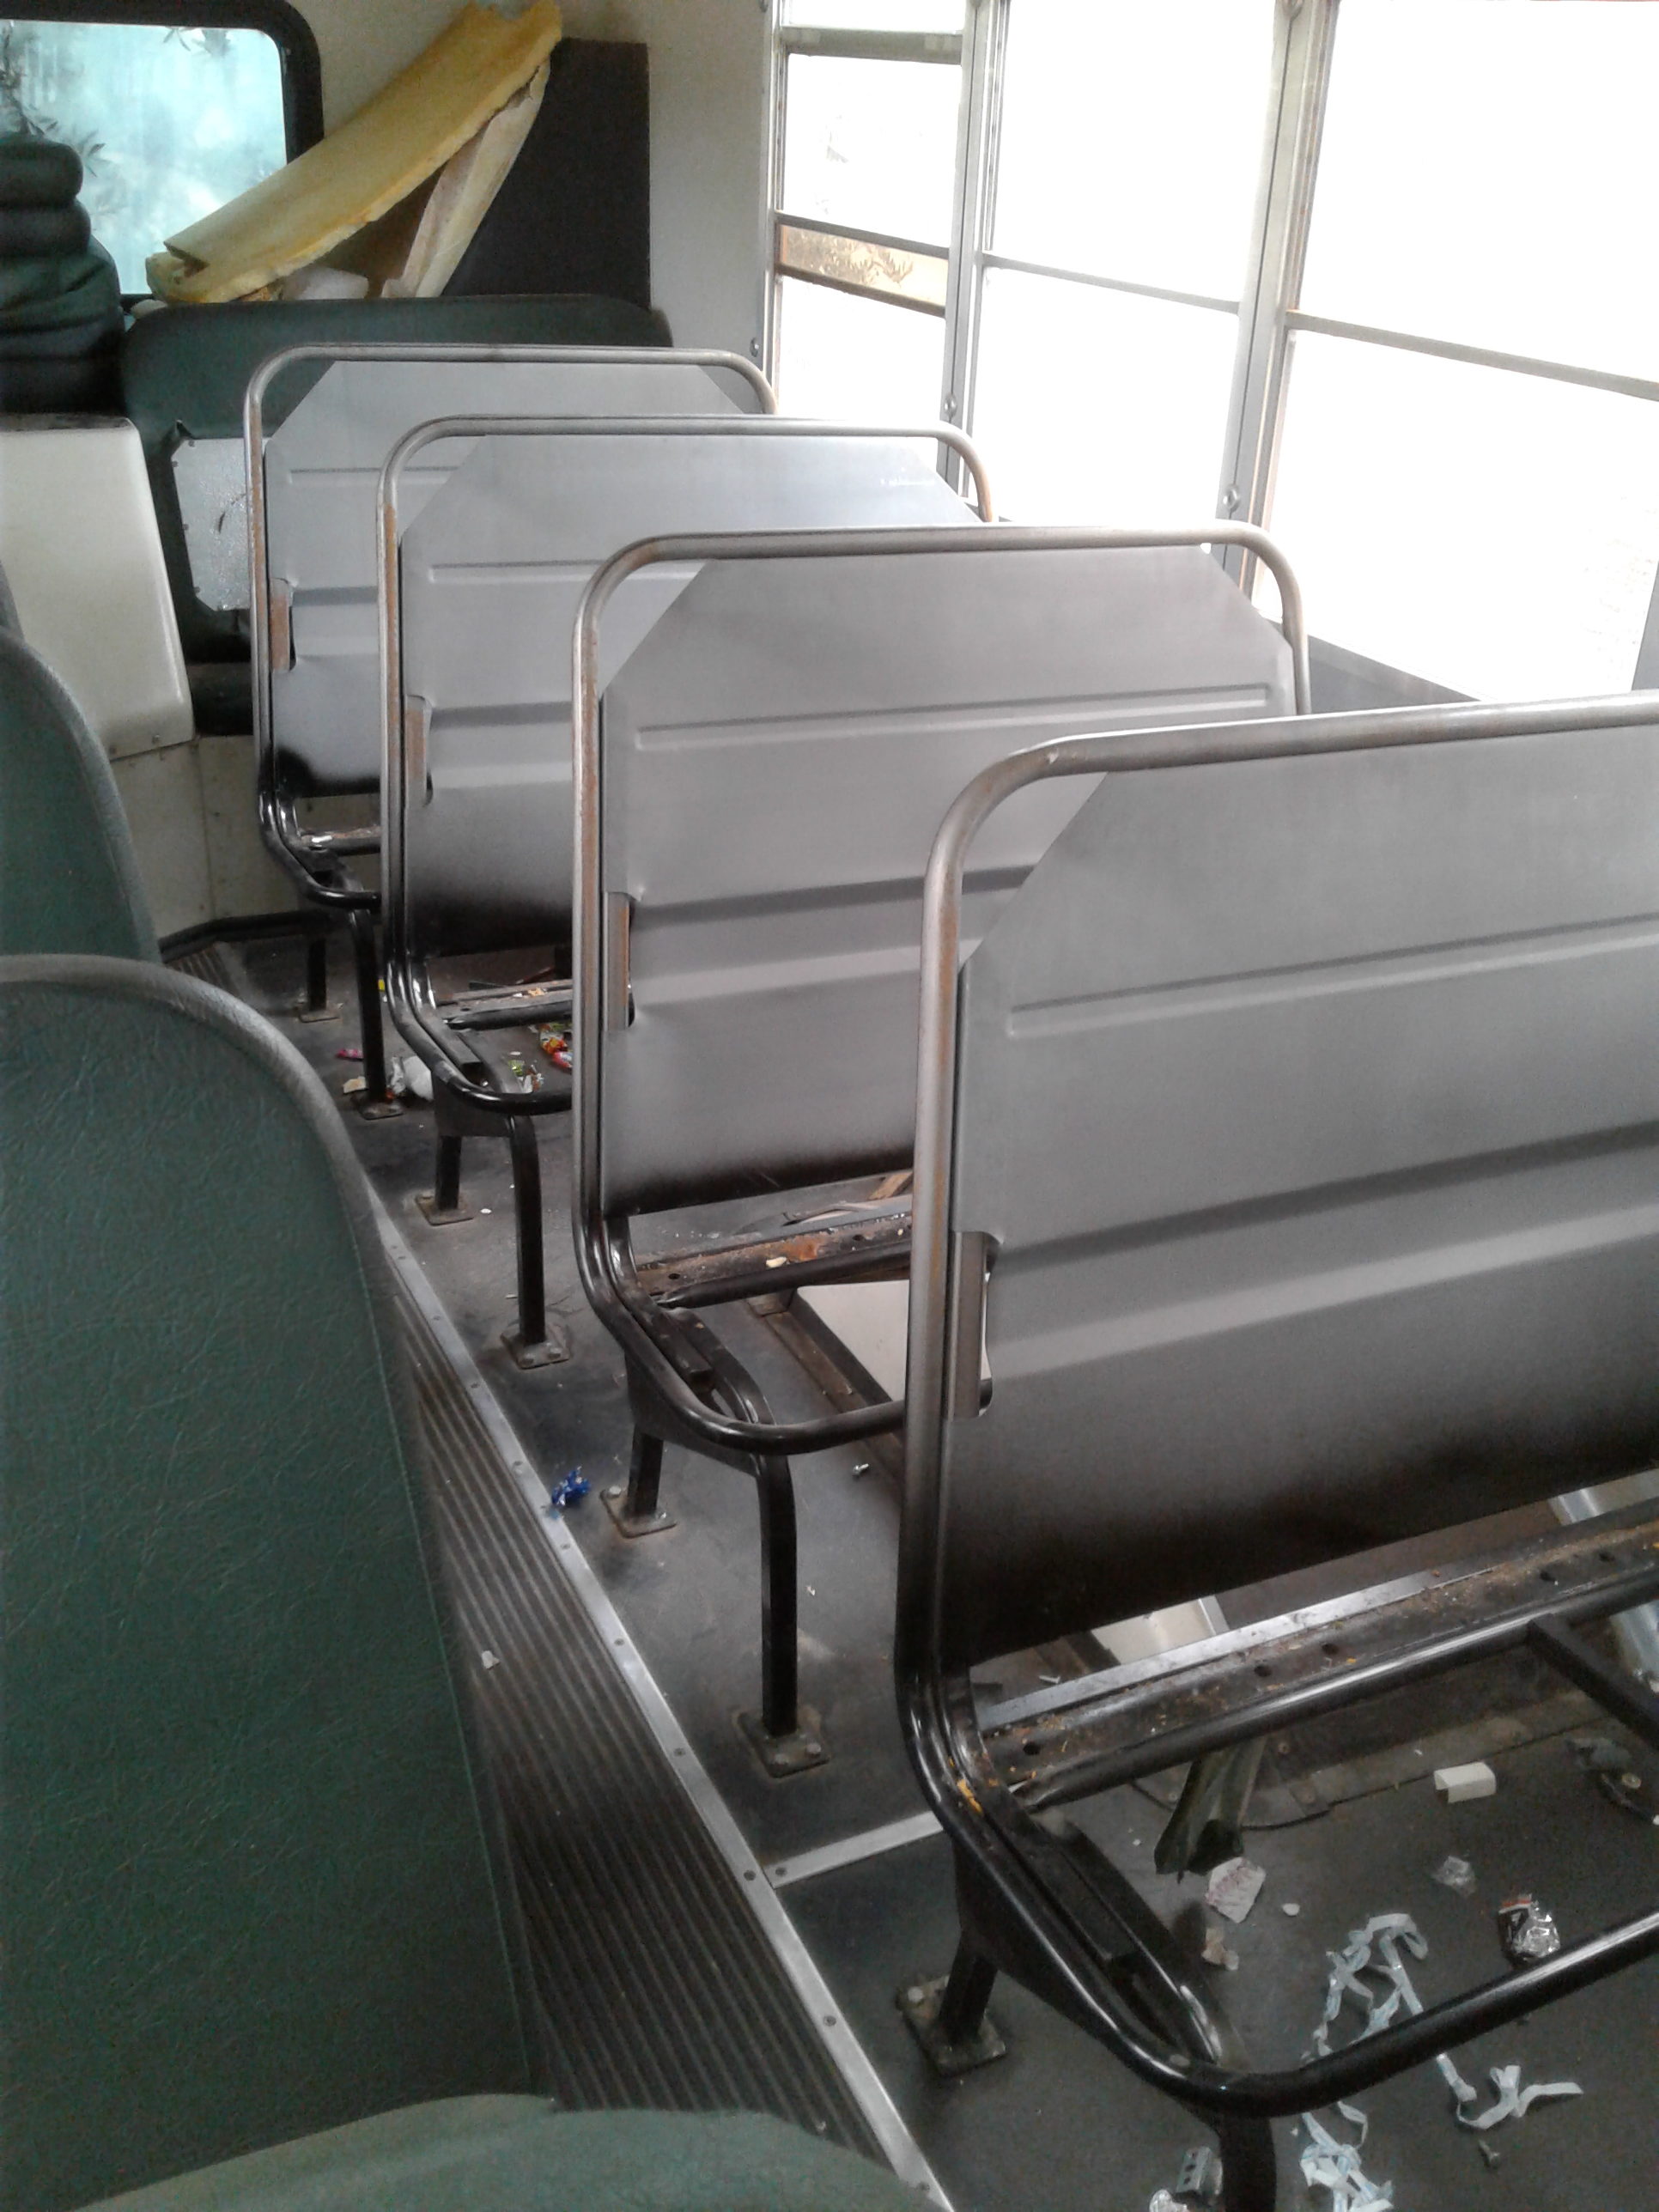
Seats sans Upholstry
Had to take a break. So I looked at the seats, to remove the padding. Pretty easy as it turns out. I just sliced the vinyl underneath along the length of the back, and the vinyl, and its padding slipped off. The seat cushion has two clamps on the front rail, and lifts off when they are unscrewed.
Ok, back to the seat legs …. I got fed up. Getting them disconnected from the wall was almost easy. I could get a socket on top, and wrench on the bottom, they came right off. But the legs at the walkway … I guess they never expected people to need to replace the seats for the life of the bus – thus, no lockwashers.
So rather than fighting with tight quarters, I decided to use the angle grinder and just cut the legs off to move the seats, and worry about the stubs later. Maybe I’ll figure out something.
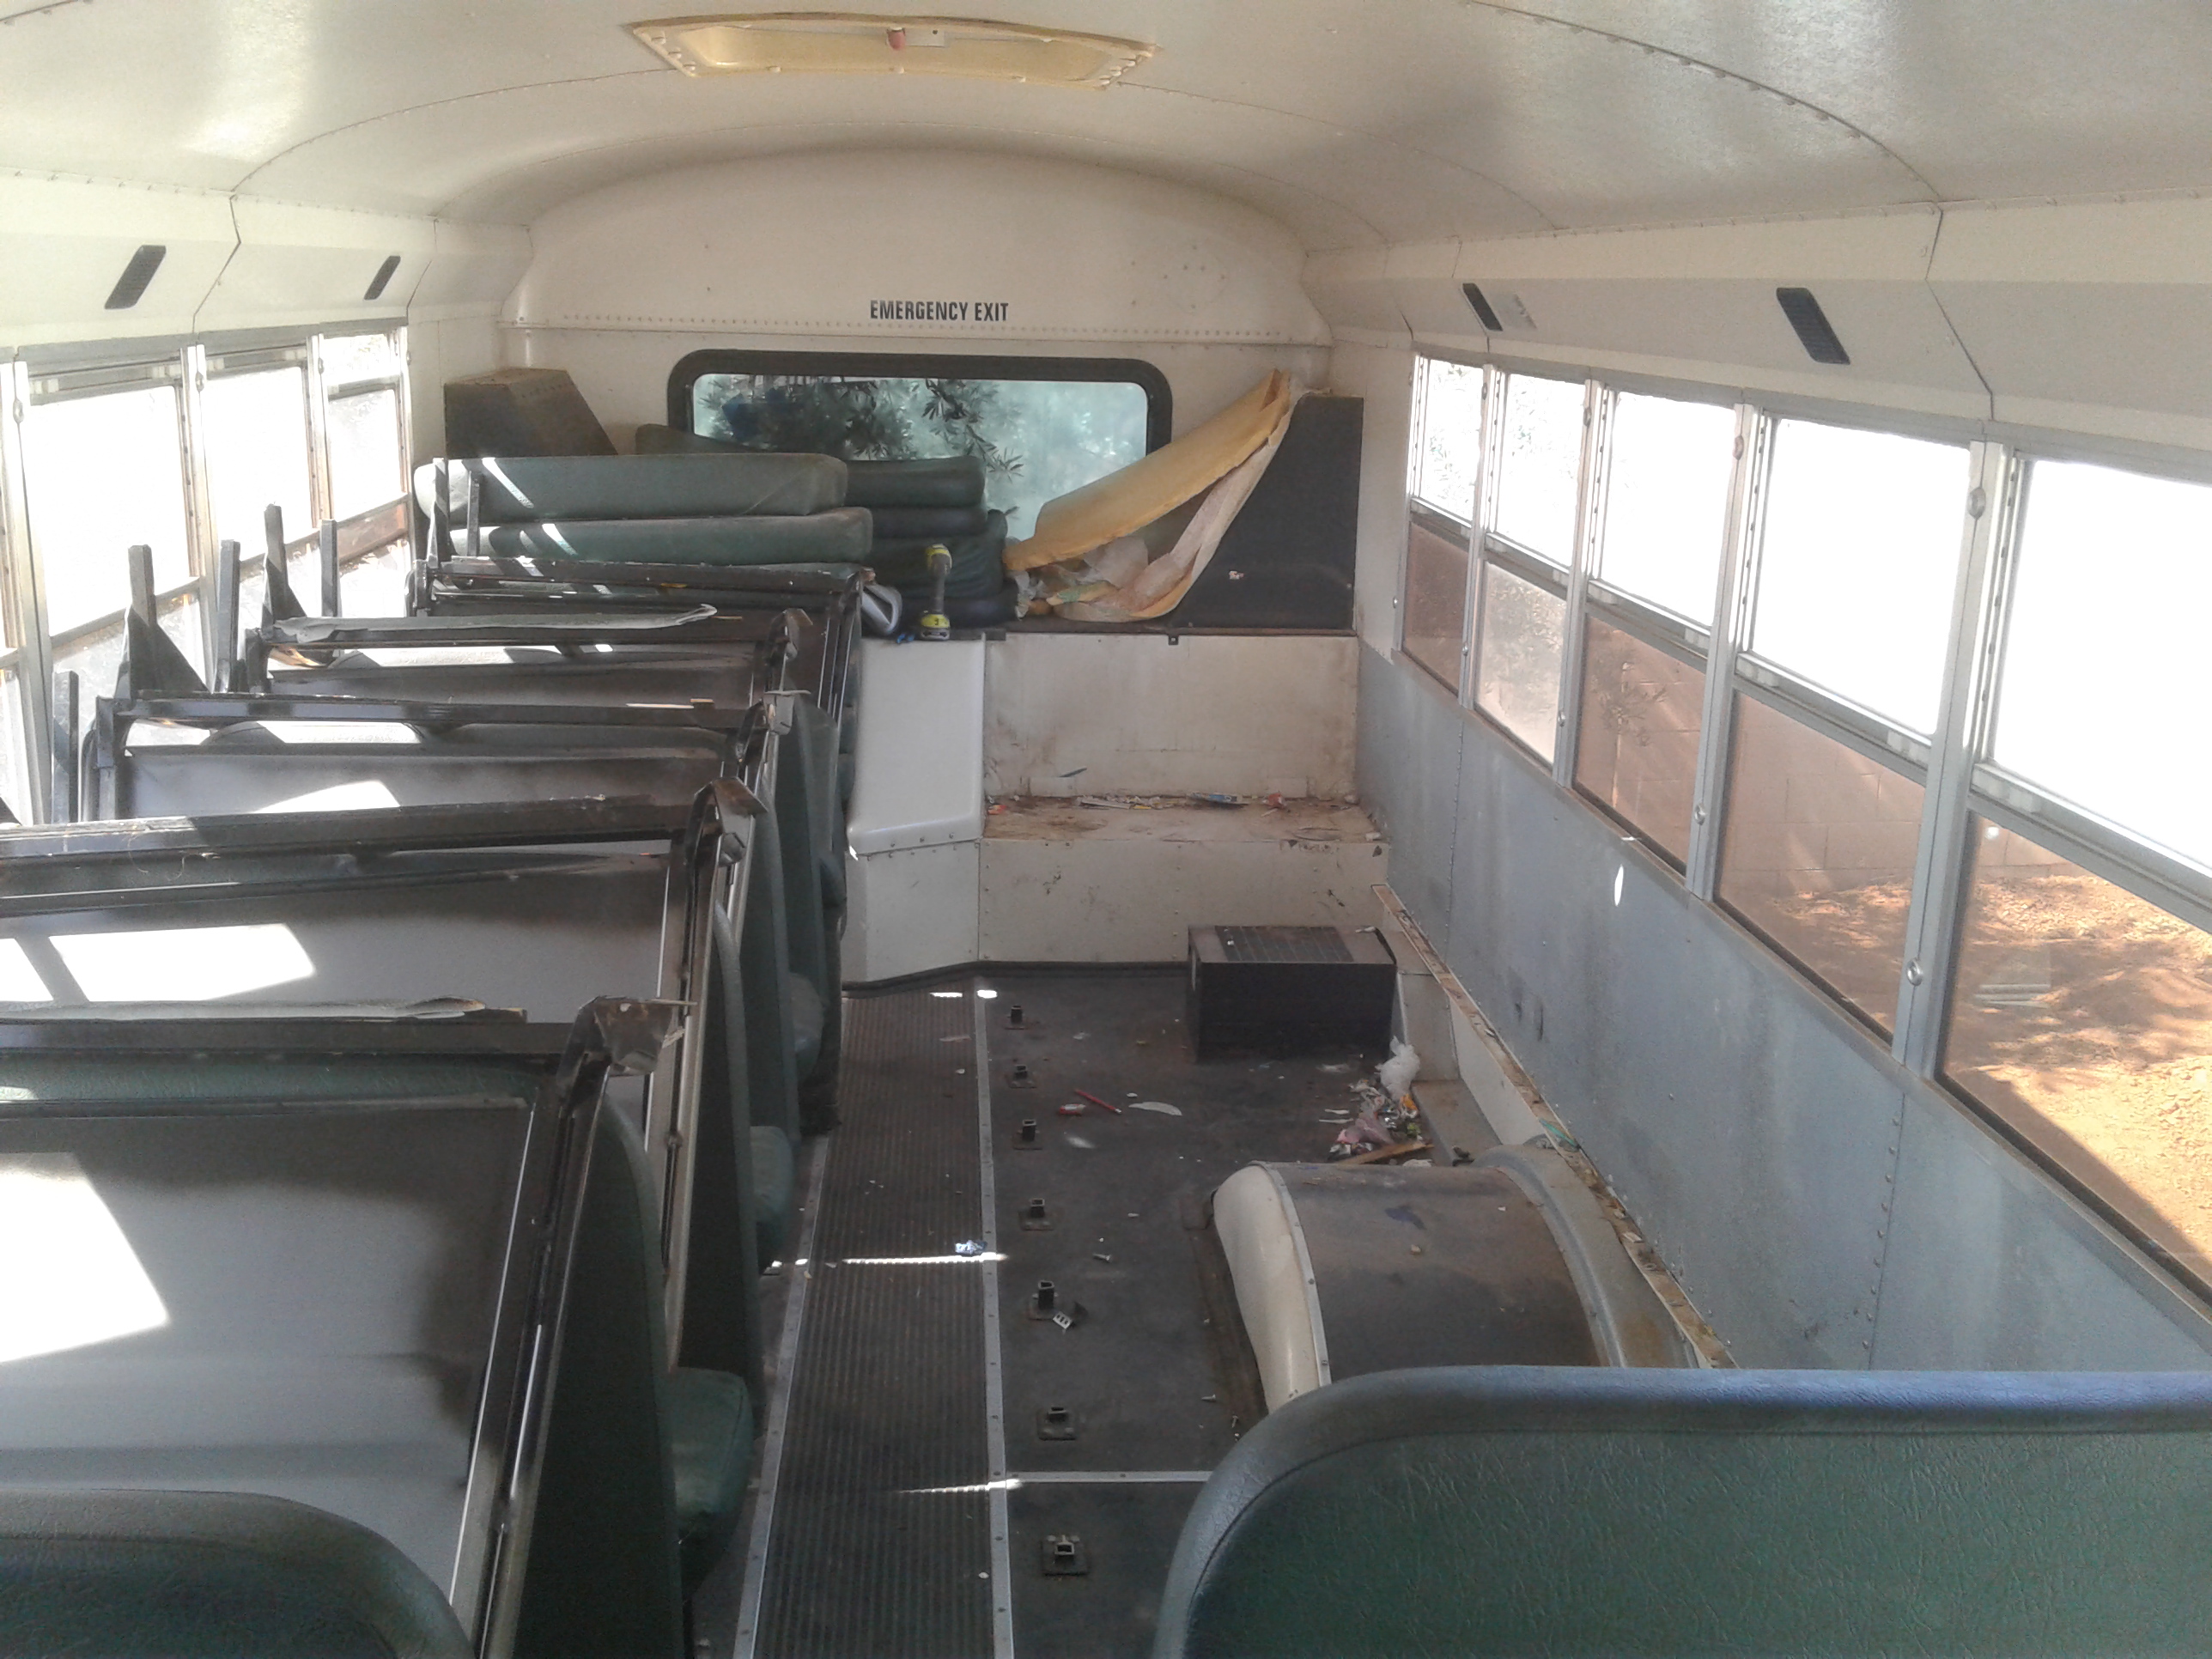
Seats Out
The difference is huge! Only half hour to pull five seats out. YAY!! progress. Course, as I wrap up this session, there is an idea I want to test. One of the things about this project is the principle of recycling. That means I wanted to find a way to use the seats instead of throwing them away. After some careful measurements a germ of an idea formed.
The height of the seat back is very close to the distance between the chassis rail, and the body-wall. And the body wall has a very convenient lip to hold things. If I could cut the seat frames just right, they would make solid floors, beneath the floor, to support the fish pond, generator, battery racks, and other storage.
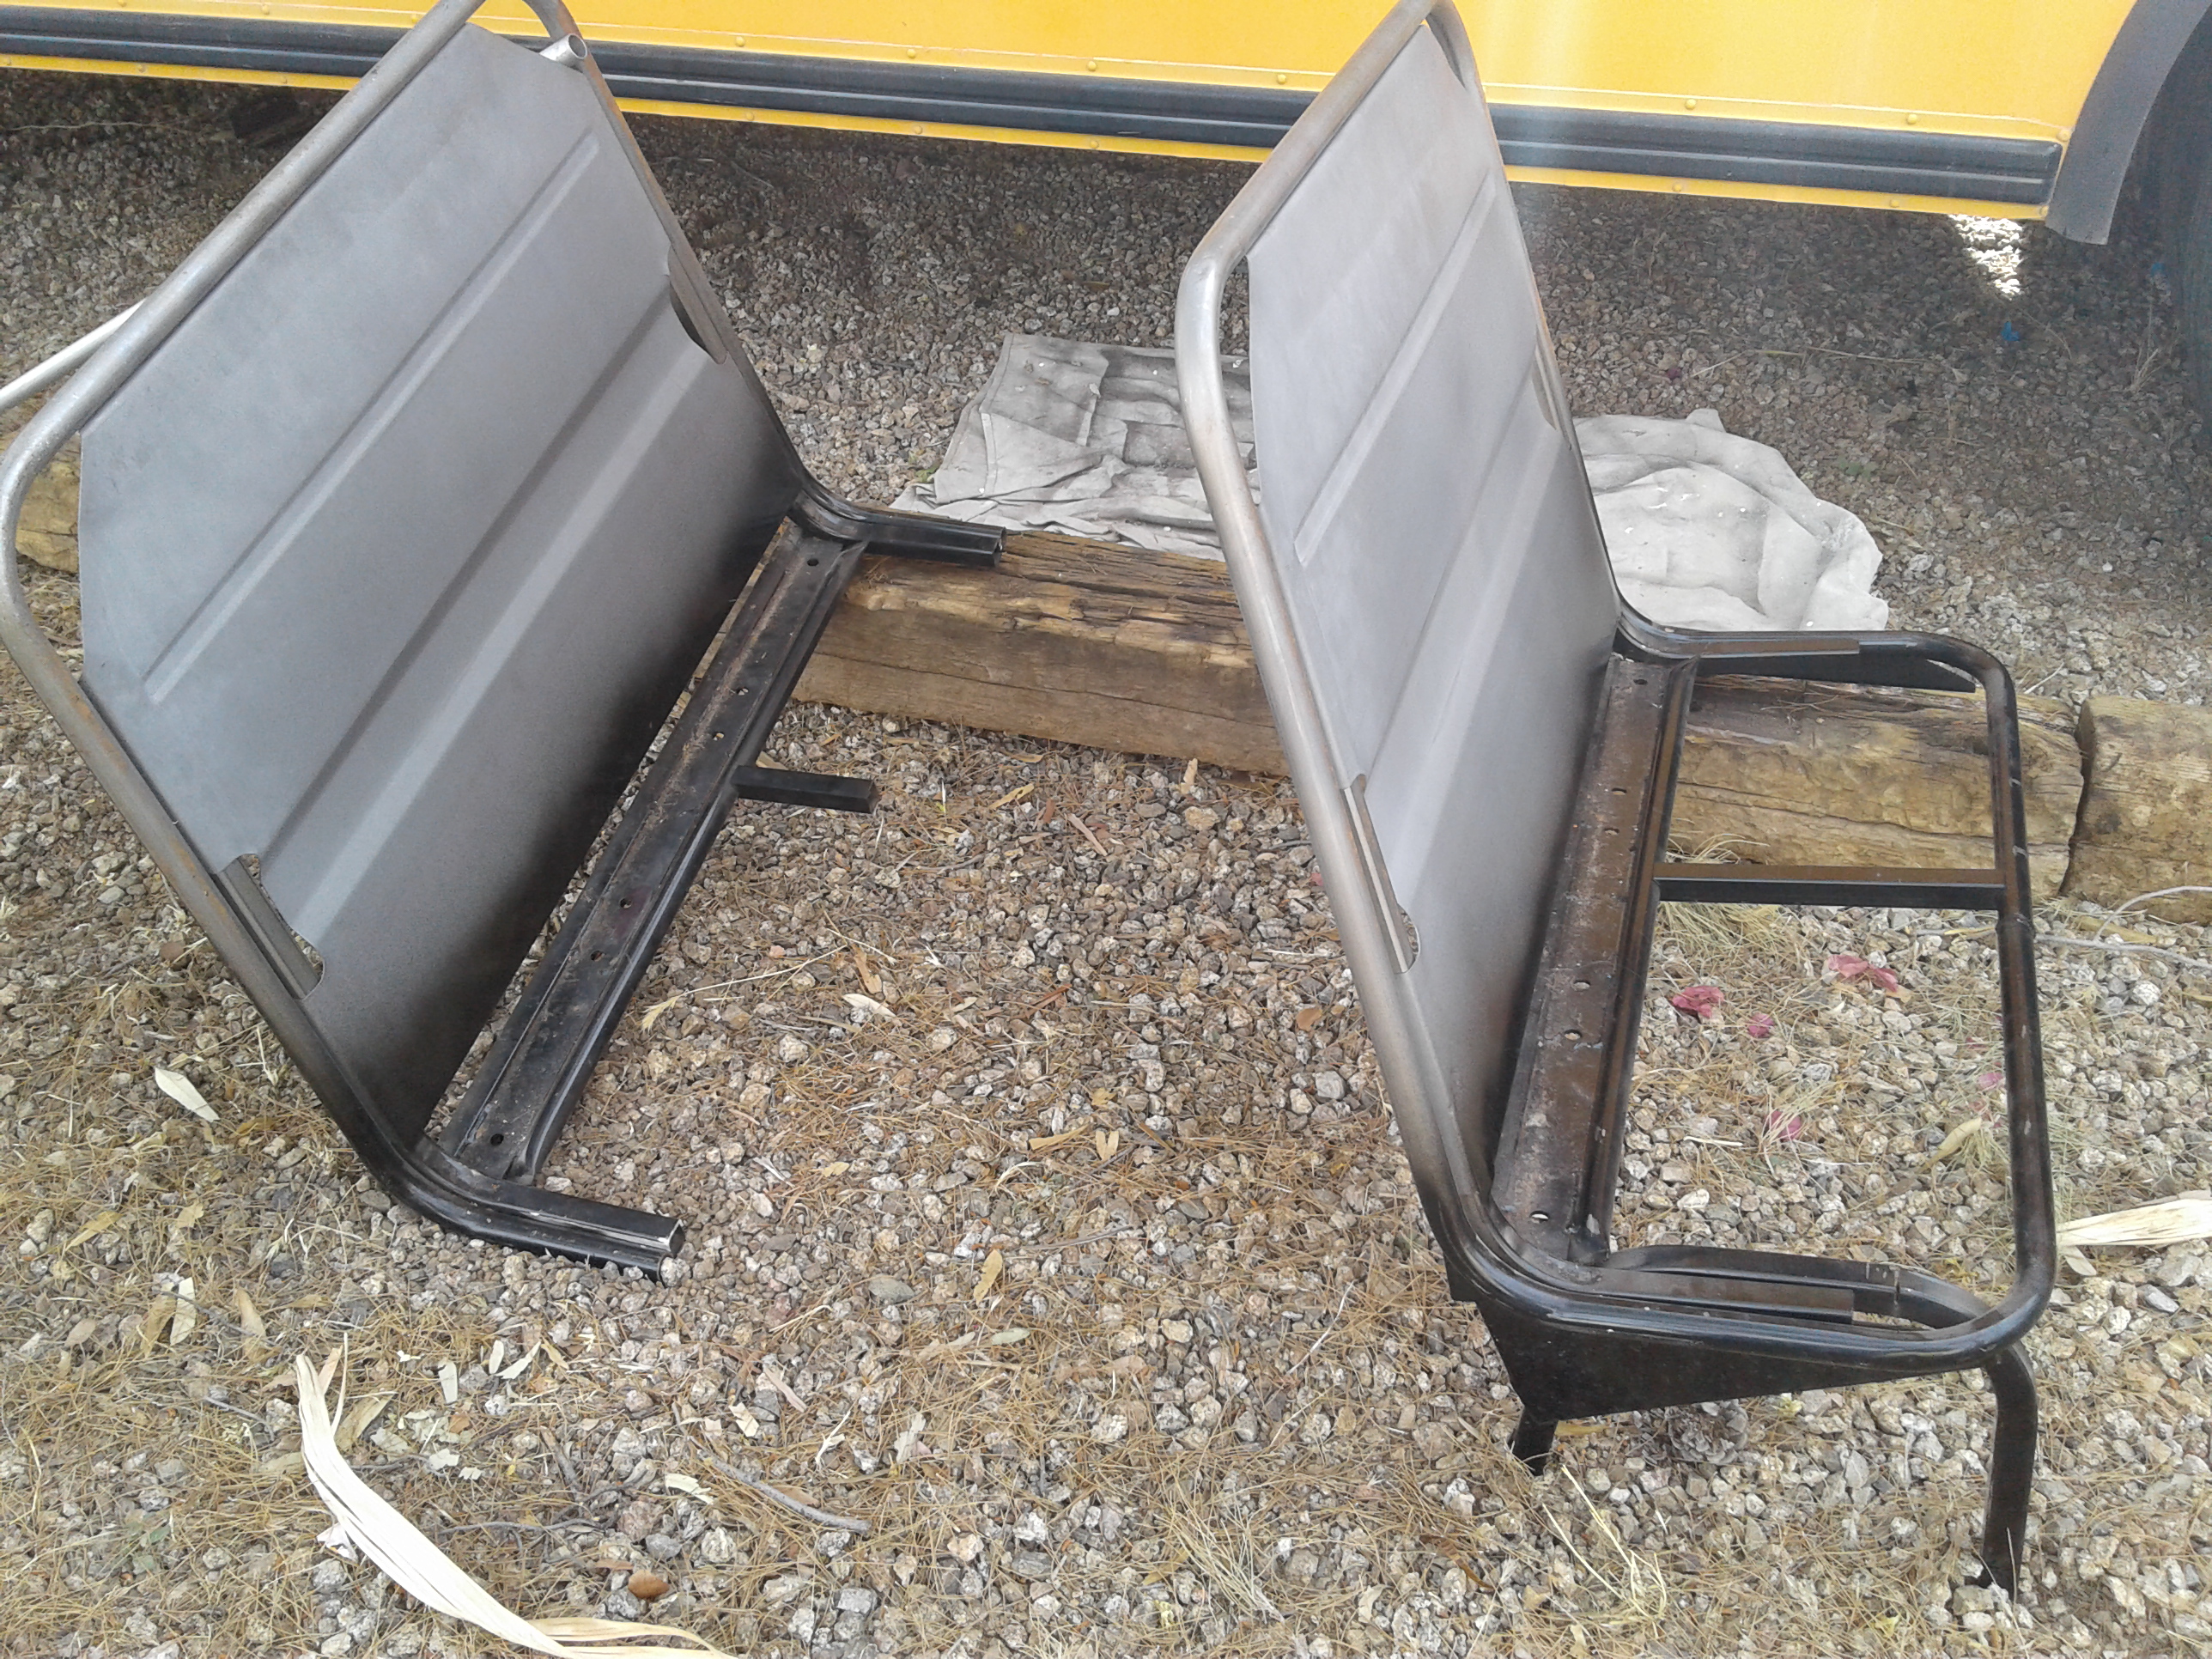 So lets take a seat, measure the obstacles up under the floor ….I attempted to fit one in as-is. No go, wishful thinking. But, was able to see how to adjust the seat frame to succeed.
So we have to lop off the legs, and part of the support for the seat cushion. Not too difficult with the angle grinder, and a fresh blade. Just real awkward to handle.
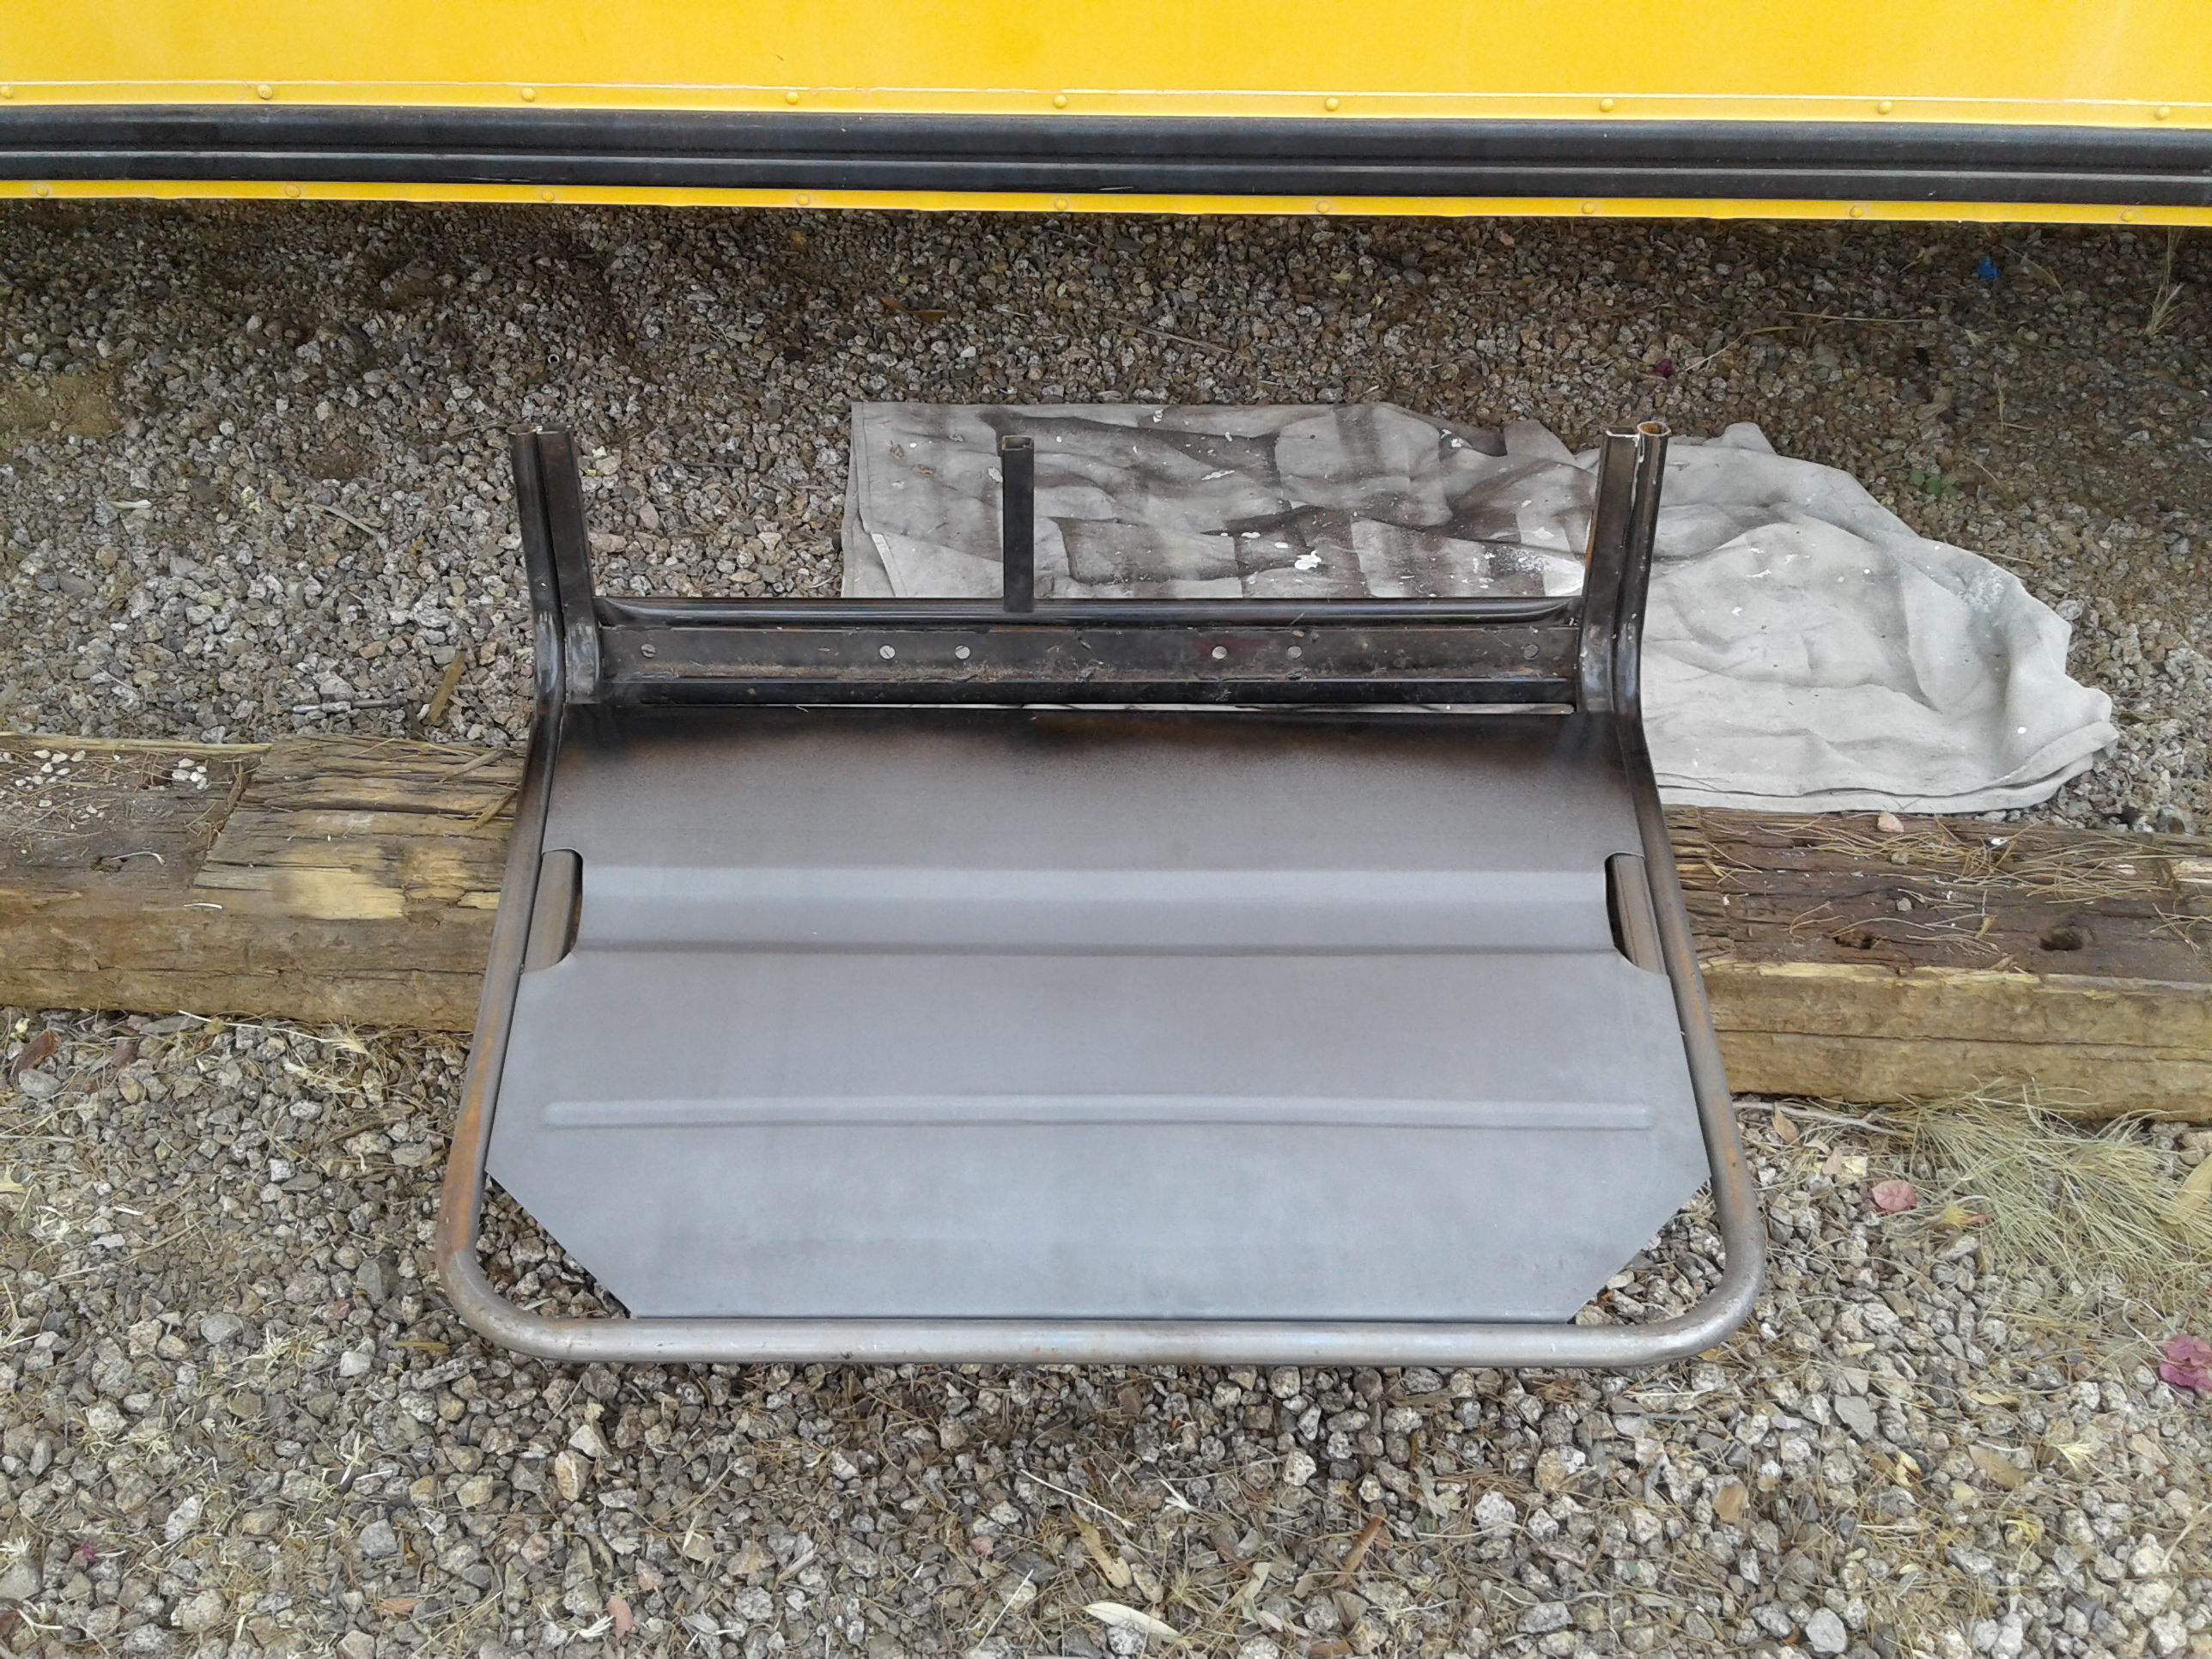 With the cuts complete, just need to rotate it, and lift it into position.
With the top of the seat-back resting on the outer wall 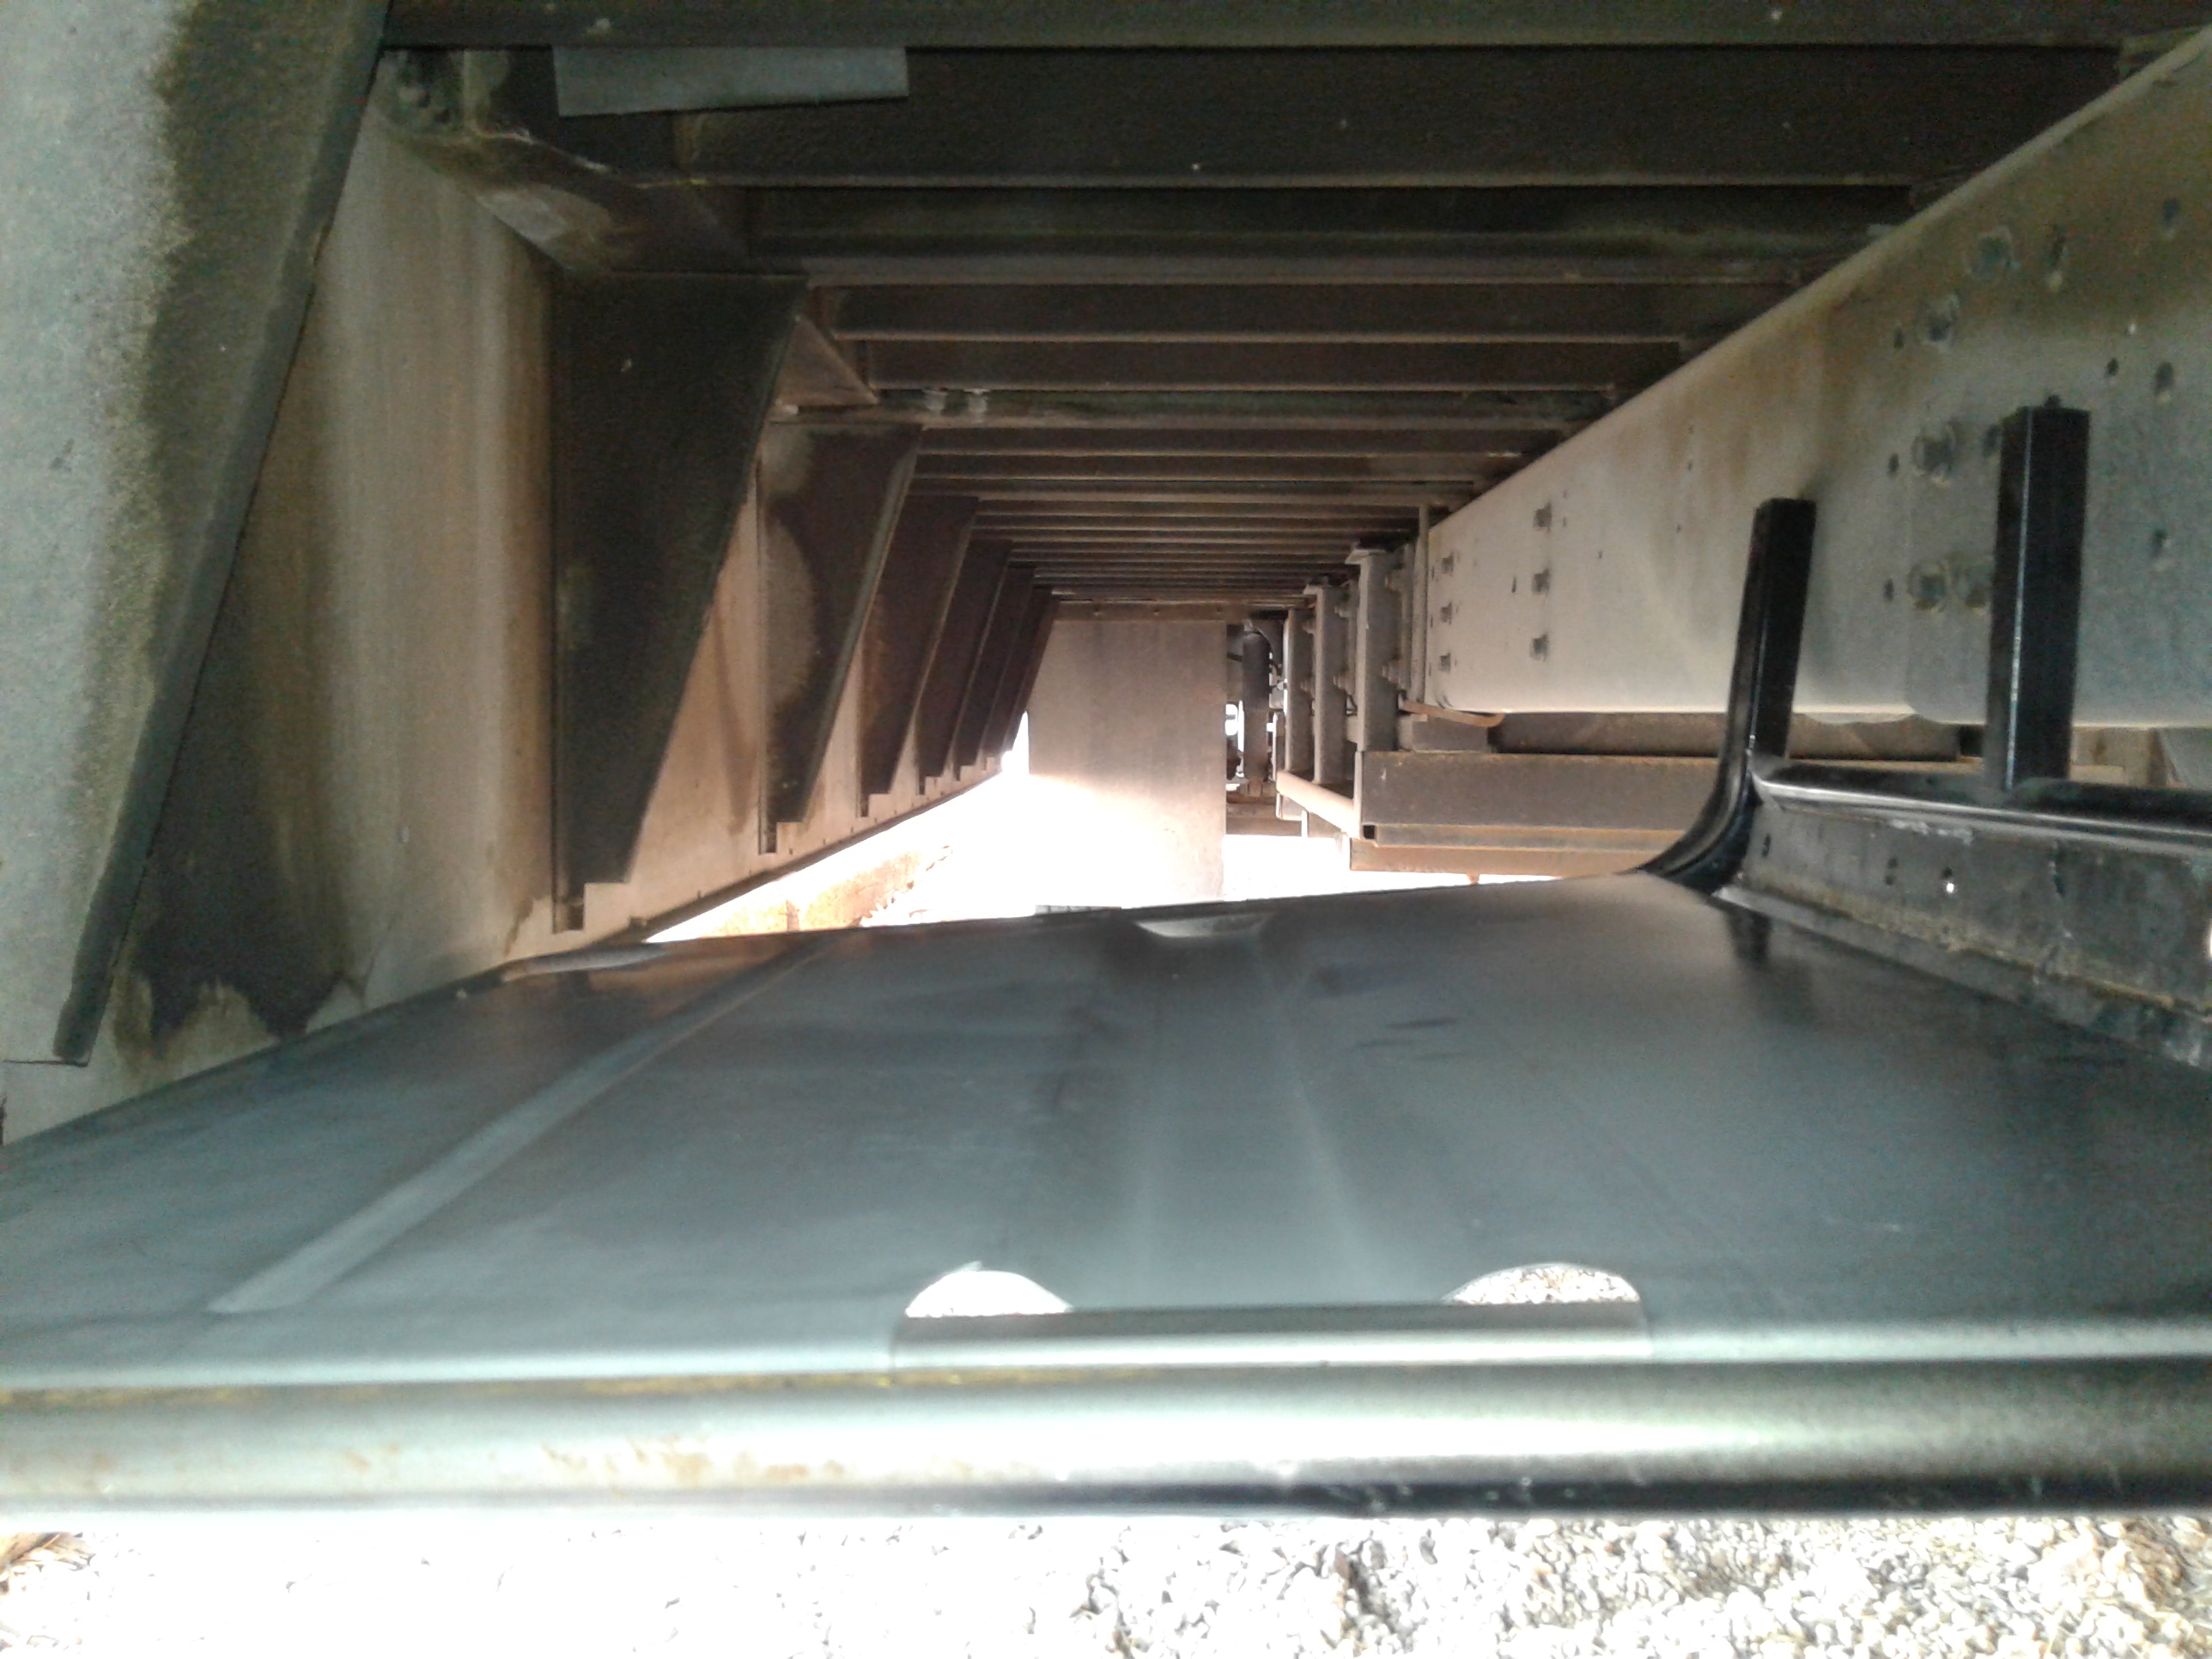 lip, the legs now rest against the chassis beam. I will drill and bolt to the chassis, and then tack-weld both the chassis, and outer wall to secure them. The seats will become my under-chassis shelf system – a strong framework with no added weight!
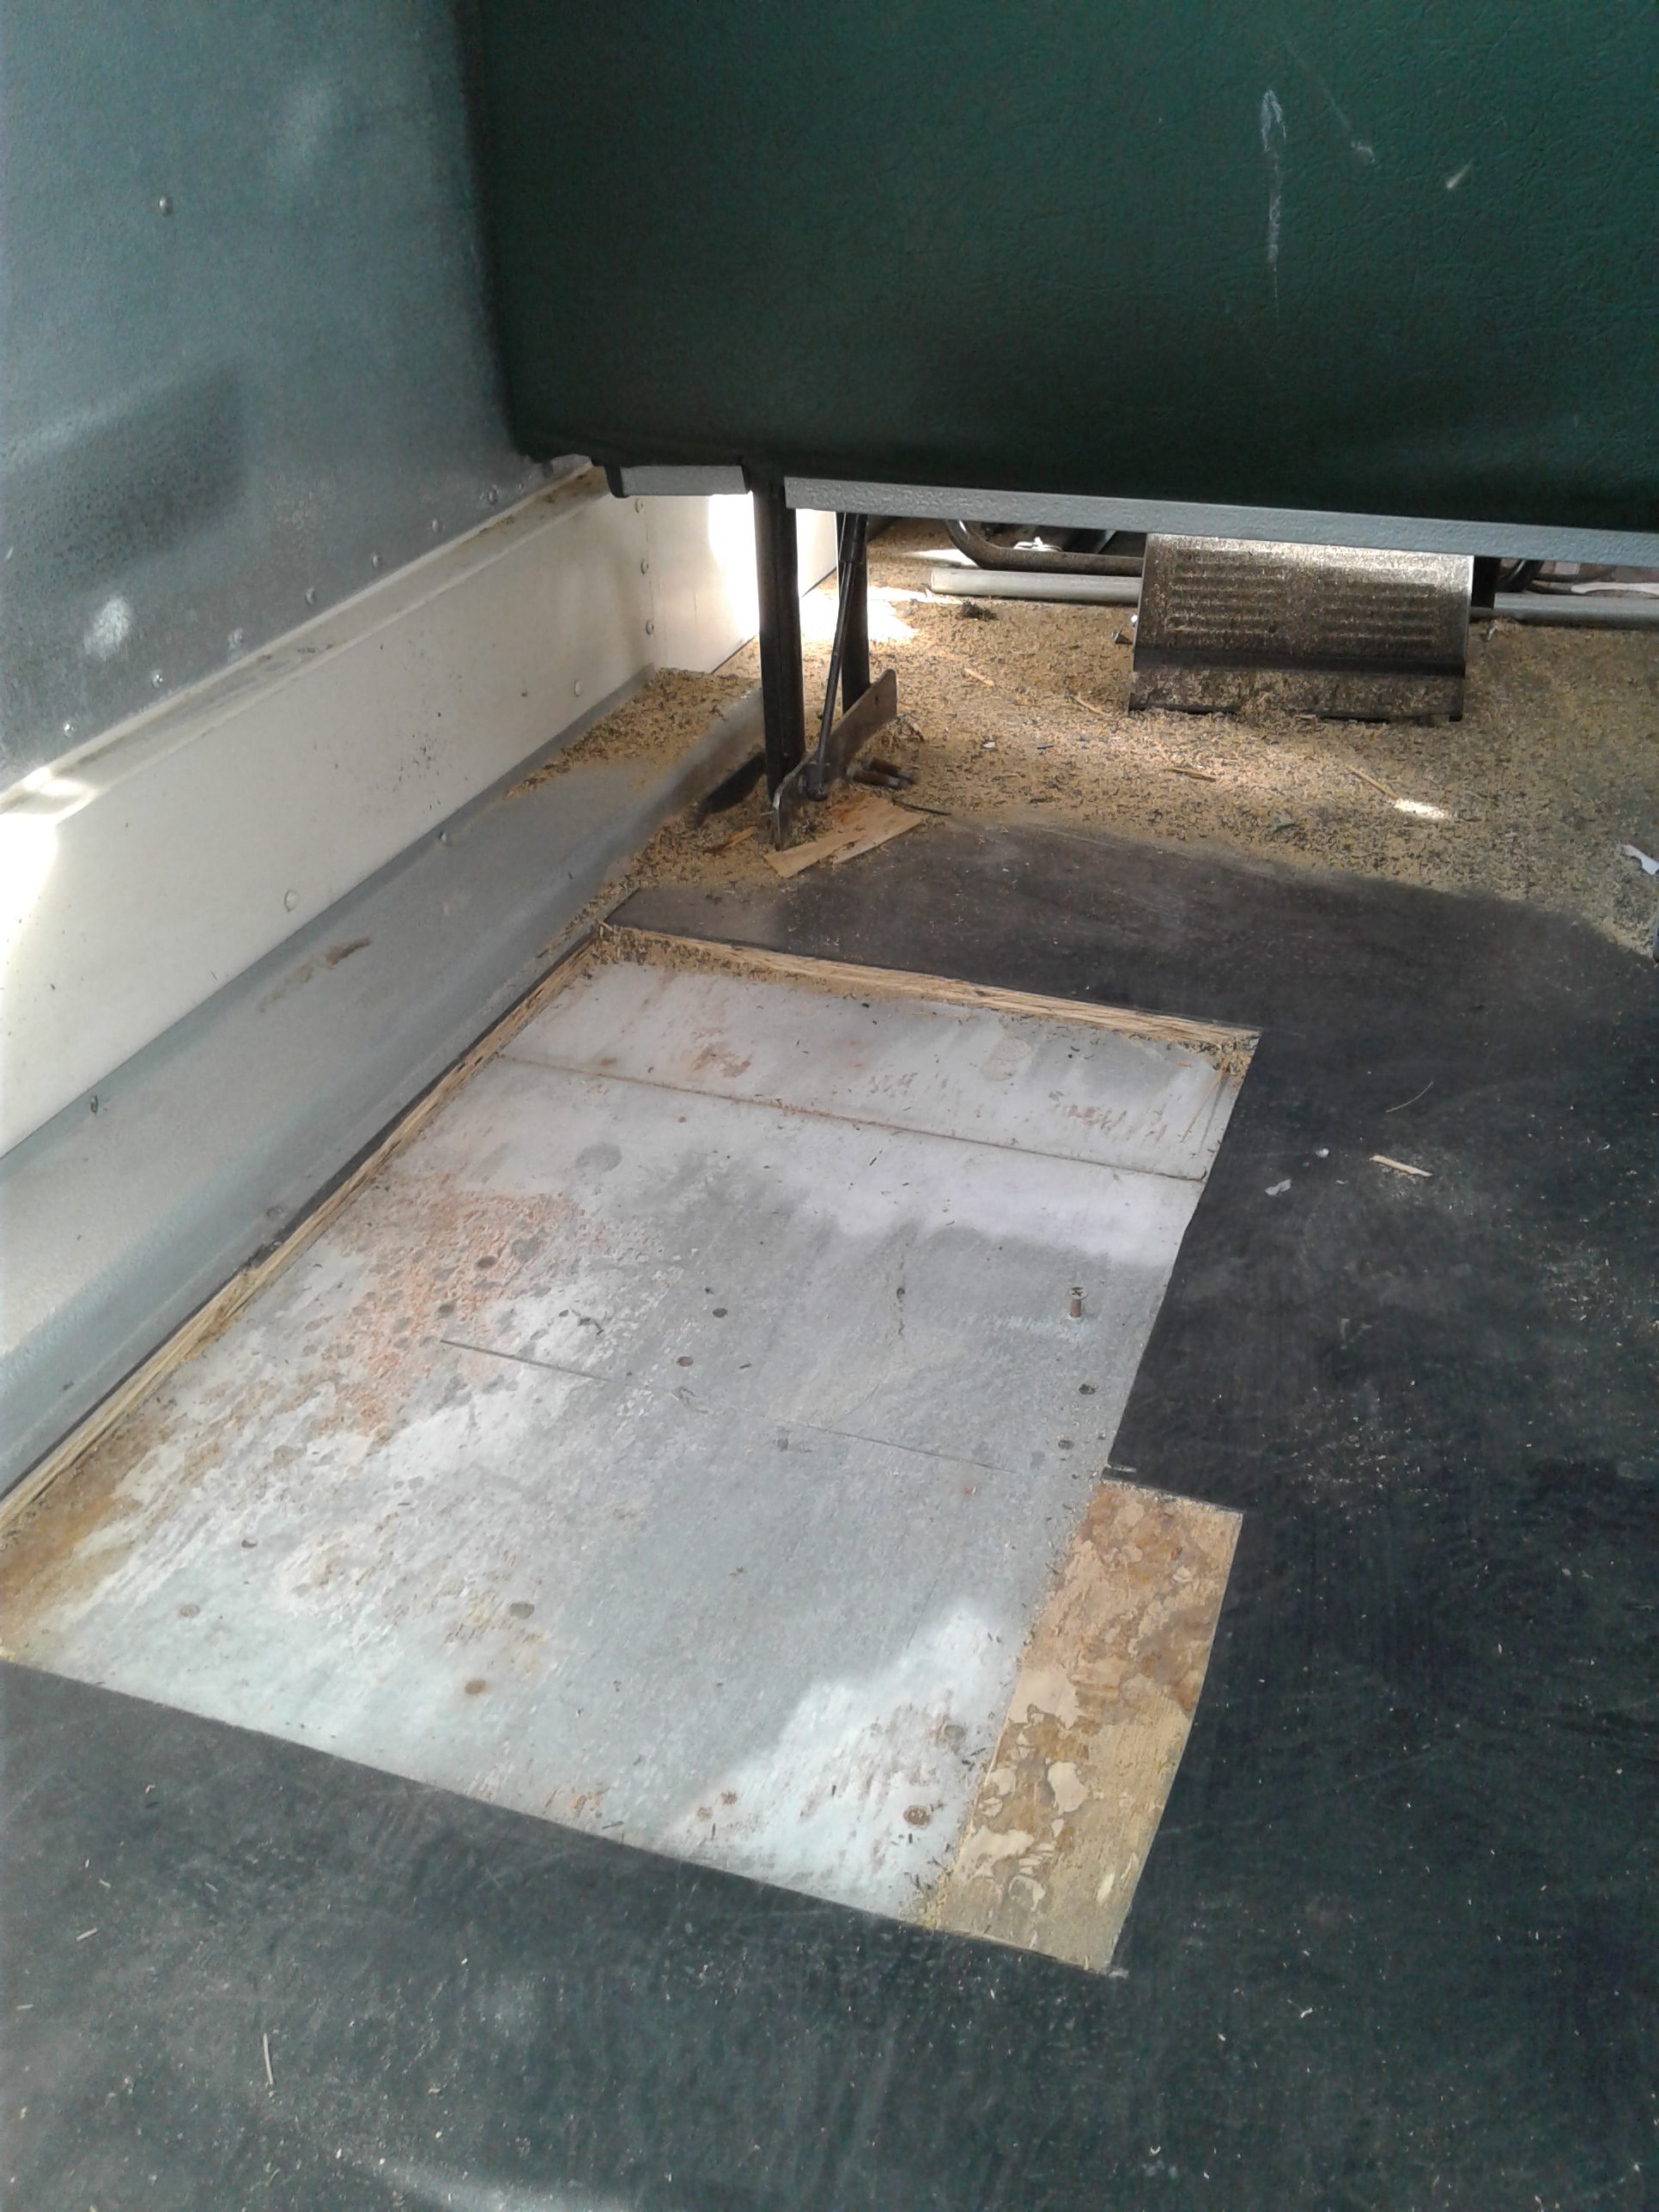
Of course, now the challenge is to open up the floor to get access to those legs for drilling, and welding! First step is to remove the rubber, then the 3/4″ plywood to reveal the sheet metal beneath. Measure where the floor joists are, and ……
 Out of time for tonight. Next time I’ll cut into the floor.